Acuity Scheduling is an easy to use online appointment booking solution that lets your customers and prospects view real-time availability, book appointments and pay online with a single click. Individual confirmations, reminders and forms create a professional booking experience and save you manual scheduling effort.
With the Acuity integration of the plugin ProductivityTools you synchronize your Daylite calendar directly with Acuity Scheduling: free times from Daylite are shown as bookable times in Acuity, and appointments booked in Acuity are automatically transferred to Daylite.
If you need help setting up Acuity itself and/or the Daylite Acuity integration, please contact our consulting team for an individual quote.
Table of contents
About Acuity Scheduling
Setting up the Daylite Acuity integration
- Setup for a single Daylite user
- Setup for Daylite multi-users
- Determining a computer for synchronization
Appointments and public holidays
About Acuity Scheduling
What is Acuity Scheduling?
Acuity Scheduling saves planning effort and avoids errors that can occur with manual scheduling. Powerful calendar coordination automatically notifies you when an appointment is booked and lets you check appointments from mobile devices.
The solution is particularly effective for small and growing companies competing with larger companies in their industry. It lets you send individual reminders, confirmations and follow-up e-mails tailored to your company's corporate identity for an even more personal customer experience. Customers can also pay online via PayPal, Stripe, Square, Authorize.net and Braintree while booking an appointment. Acuity can be connected to a number of other online services, including Zapier, Quickbooks and Mailchimp, for more flexibility.
The Daylite Acuity integration is suitable for Daylite single-users (see Setup for a single Daylite user) as well as for Daylite multi-user environments (see Setup for Daylite multi-users).
Acuity Scheduling at a glance
Acuity Scheduling offers a comprehensive feature set that flexibly adapts to your company's needs:
- Calendars & availabilities: A separate calendar for each employee or location, availabilities that can be limited by opening hours, weekdays and vacation times, as well as automatic time zone management for customers in different locations.
- Appointment types & booking: Unlimited free or paid appointment types, appointment packages and group events limited by number of participants, plus redeemable vouchers.
- Individual intake forms & scheduling page: Separate forms per appointment type, including terms and conditions or data protection confirmation, as well as a scheduling page customized with your logo, colors and language, which you can share via link or seamlessly integrate into your own website or Facebook.
- Communication: Individually customizable confirmations, cancellations and reminders by e-mail and text/SMS, as well as automatic follow-up e-mails, for example in combination with services like CustomerThermometer.
- Customer management: A complete history of all appointments booked per person, optional user accounts for customers and prospects, plus easy import and export of customer and appointment data.
- Mobile app & further integrations: The Acuity Scheduling app for iOS and Android, as well as connections to calendar services (iCal, Outlook, Google Calendar), email marketing tools such as Mailchimp, web conferencing services such as Zoom, billing systems such as QuickBooks and Xero, CMS systems and the data hub Zapier.
Setting up the Daylite Acuity integration
Setup for a single Daylite user
Learn how to install iOSXpert Plugins in this video tutorial.
To set up Acuity for a single Daylite user within ProductivityTools, proceed as follows:
- Select the menu Plugins -> ProductivityTools -> Preferences...
- Under Integrations -> Acuity Scheduling -> Activate Acuity Scheduling Integration
- Click Sign In to log in to your existing account or create an account with Create new account
- Select the Acuity Calendars you want to synchronize with your Daylite Calendar
- Activate automatic blocker export to transfer your Daylite appointments as blockers to Acuity
- Activate automatic appointment import to transfer your Acuity appointments to Daylite
- Set the interval for automatic synchronization
- Under Advanced, set how you want to categorize Acuity appointments in Daylite:
- Default category Created by Acuity
- Adoption of the Acuity Appointment Category as Daylite category
- Adoption of the Acuity Appointment Type as Daylite category
- Set up the type of name that the Daylite appointment shall correspond to
Setup for Daylite multi-users
To set up Acuity for multiple Daylite users within ProductivityTools, proceed as follows:
- Select the menu item Plugins -> ProductivityTools -> Preferences...
- Under Integrations -> Acuity Scheduling, activate the Acuity Integration
- Click Login to log in with your existing account or create an account with Create Account
- Associate the Acuity Calendars with the corresponding Daylite users
- Determine whether the synchronization with Acuity will be performed for all users centrally on one Mac (see Determining a computer for synchronization)
- Make sure that Daylite is always active on the selected computer to ensure constant synchronization with Acuity
- Enable Blocker Export to transfer your Daylite appointments as blockers to Acuity
- Enable Appointment Import to transfer your Acuity appointments to Daylite
- Set the interval for automatic synchronization
- Under Advanced, set how you want to categorize Acuity appointments in Daylite:
- Default category Created by Acuity
- Adoption of the Acuity Appointment Category as Daylite category
- Adoption of the Acuity Appointment Type as Daylite category
Determining a computer for synchronization
Up to version 2.5.0 of ProductivityTools, users using Daylite on multiple computers were synchronized with Acuity on all computers. If these computers were used simultaneously, this could lead to duplicated appointments.
| Note: From version 2.5.1, a device for synchronization with Acuity must be defined. We recommend a computer on which Daylite is permanently active and standby mode is disabled. |
Carry out the following steps on the computer that you have planned for synchronization:
- Log on with the user who is to perform the synchronization
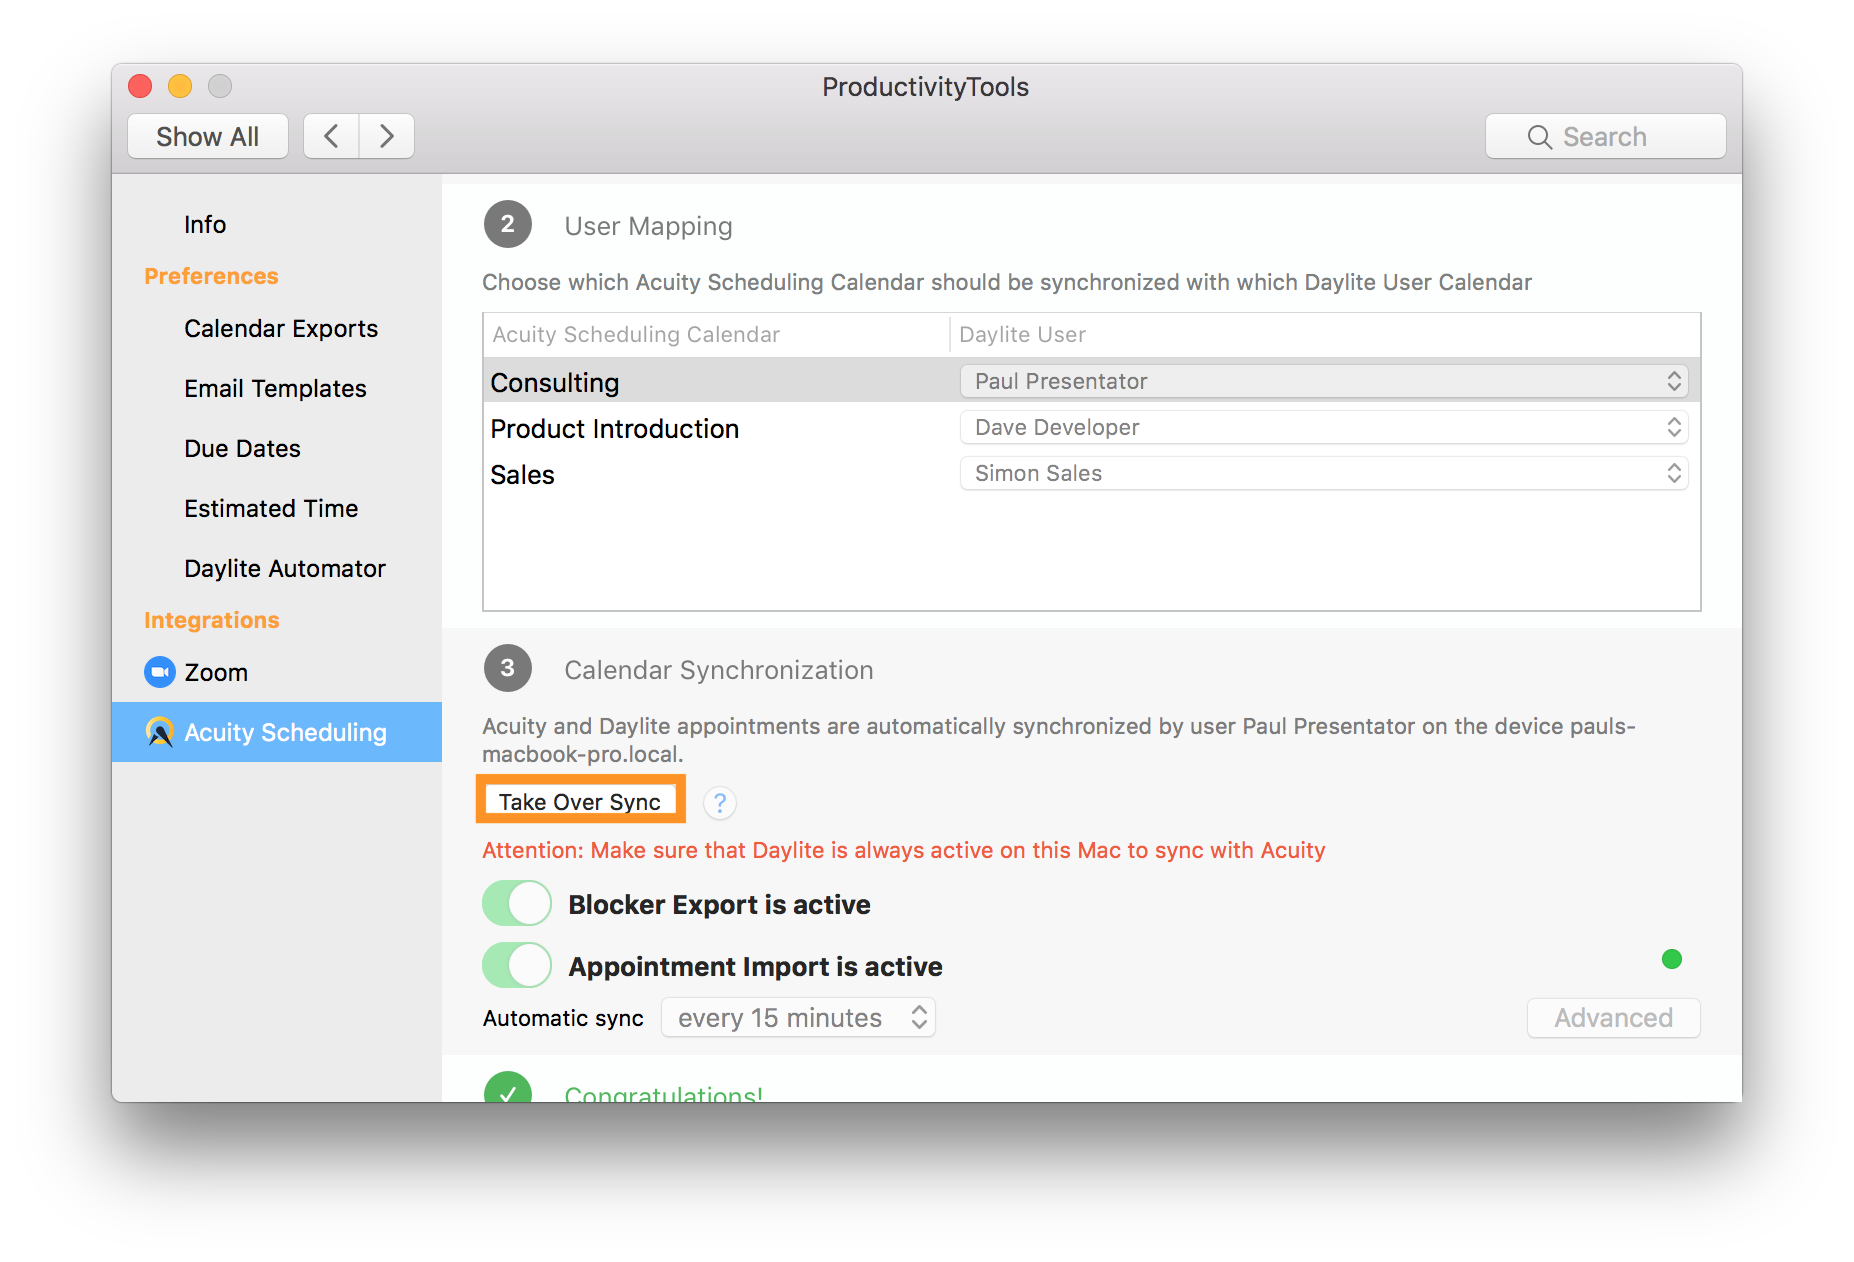
- Open the PluginCenter and navigate to ProductivityTools → Acuity Scheduling
- In the Calendar Synchronization section, click the Take Over Sync button
- Accept the change by pressing the Confirm button
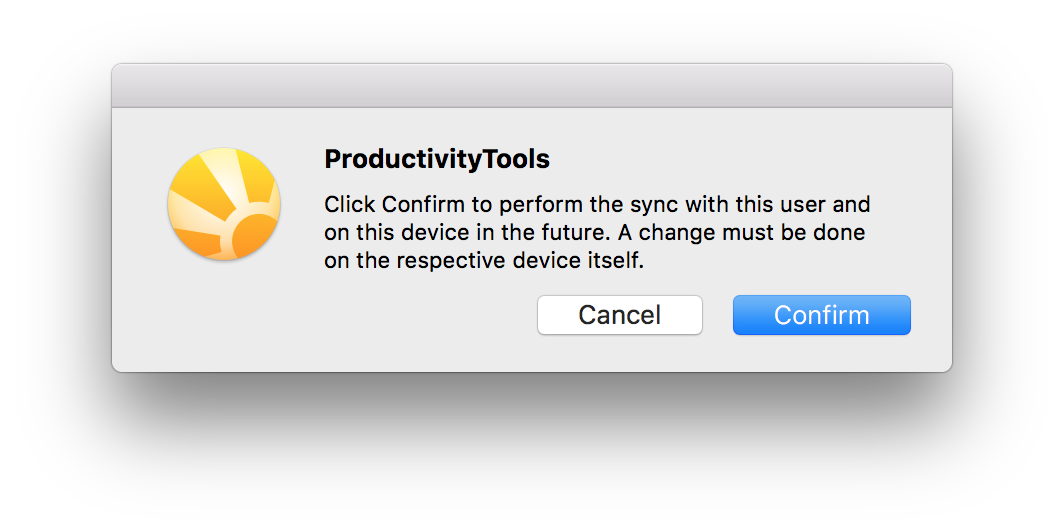
In the Calendar Synchronization section you can see which user is currently performing the sync on which computer. If you want to change the user or the device, carry out the steps above on the other device/user.
Appointments and public holidays
Which appointments are exported as a blocker?
The Acuity integration of ProductivityTools allows you to automatically import appointments booked via Acuity Scheduling into Daylite.
When you activate the export of Daylite appointments as blocker in Acuity Scheduling in the settings of the Acuity integration, all Daylite appointments that are shown as Busy and have the status Confirmed or Tentative are transferred as blockers. Appointments with the status Postponed, Canceled or Completed and all appointments that are shown as Free are not exported.
| Please note: appointments from subscribed external calendars are also not transferred to Acuity, as they are not "real" Daylite appointments. |
How to configure the Acuity integration is shown in Setup for a single Daylite user and Setup for Daylite multi-users.
How can I transfer public holidays to Acuity?
Only actual Daylite appointments that are displayed as busy are transferred as blockers to Acuity.
| Please note: All-day appointments must always be manually set to busy, as they are displayed as free by default. In addition, no appointments from calendar subscriptions are transferred as blockers. |
You can manually add public holidays directly as Daylite appointments. However, this method is time-consuming, and public holidays can easily be forgotten. To add public holidays quickly and securely, proceed as follows:
- Search in your browser for a suitable public holiday calendar as an ICS download
- Download the public holidays as ICS files
- Drag the ICS files onto the Daylite icon in your dock to import the appointments into Daylite
- The list Last import opens in Daylite with all imported holidays
- You can now delete unnecessary holidays and invite employees to the appointments
The public holidays are transferred as blockers to all Acuity calendars of all invited employees. However, the invitation must be accepted by the employees for the appointment to be transferred as a blocker.