Web&Map is the iOSXpert plugin that connects your Daylite contacts, addresses and appointments with Apple Maps. The Map part displays your geocoded Daylite records on a map, searches the web and your database for addresses, runs vicinity searches and hands results over to Apple Maps.
For an overview of the whole plugin, see What is Web&Map?
Table of contents
Prerequisite: geocode your records
- Configuring the map feature of Web&Map
- Geocoding your database manually
- Geocoding your database automatically
- Finding data that is not yet geocoded
Opening and controlling the map
- Where do I find the map feature?
- 3D view and gesture controls
- What do the numbers and pin colors mean?
Searching and creating records
- Searching for contacts, appointments and addresses
- Creating a contact from a search result
- Adding an address to a contact
- Creating a new company record
- Address look-up in a company record
- Address look-up in a person's record
- Address look-up in an appointment
- Showing appointments on the map
Displaying records on the map
- Displaying a selection of contacts
- Viewing all Daylite locations
- Viewing contact details
- Using the detail view and editing contacts
- Getting back to your last search
- Saving the map view as an image
Vicinity search
- Vicinity search based on a map search
- Vicinity search based on a set of Daylite data
- Free vicinity search
- Saving the result of a vicinity search
Planning a route with Apple Maps
Prerequisite: geocode your records
In order to work with the Map part of Web&Map, the Daylite records have to be geocoded beforehand. For your contacts or appointments in Daylite, longitude and latitude is determined by geocoding to be able to display them in the Apple Maps view.
Configuring the map feature of Web&Map
This video shows you how to configure the map feature of the Daylite plugin Web&Map.
To perform geocoding, do the following:
- Navigate within Daylite in the menu bar to Plugins -> Web&Map -> Preferences
- Select the tab Geocoding -> Launch now
- Check the Launch automatically box to geocoded addresses automatically. As an interval we recommend every day
| Note: A maximum of 2500 addresses can be geocoded within 24 hours. Geocoding can therefore take several days for more than 2500 addresses. |
Geocoding your database manually
To geocode a database, please proceed as follows:
- Select all Daylite contacts by using the shortcut ⌘+A
- In the menu bar navigate to Plug-Ins -> Web&Map -> Add or update geo coordinates for selected objects
- In the following window, click Start
- Choosing Show in Daylite after geocoding, shows you the contacts where the geocoding failed
| Please note: Web&Map automatically creates a Daylite group with all records missing an address as well as records where geocoding failed. Make sure to review these groups on a regular basis to improve the data quality of your database. |
Geocoding your database automatically
To activate automatic geocoding, please proceed as follows:
- Select Plugin from the menu bar and navigate to Web&Map -> Preferences -> Geocoding
- Determine whether you want to geocode persons and/or companies. If you are using addresses in conjunction with appointments, you can also geocode them automatically.
- Check the box next to Launch automatically and select a desired time interval.
- Once a dataset has been geocoded successfully, this record will not be geocoded automatically after that. If you want to geocode older records automatically after a certain time, check the box next to Update geo coordinates older than x days and enter the desired number of days.
Your Daylite data will now automatically be geocoded in the selected time interval and can be displayed in the map view of Web&Map.
Finding data that is not yet geocoded
To identify which contacts are geocoded, please proceed as follows:
- Select People or Companies from the Contacts section in the Daylite sidebar
- Click the funnel icon
to filter for not geocoded persons or companies
- Choose the criteria Geocoded for Web&Map and No
- The search result will only contain persons or companies that are not yet geocoded
Web&Map also creates a group in Daylite that includes non-geocoded contacts.
Opening and controlling the map
Where do I find the map feature?
The following video shows you where to find the Map part in Web&Map.
You can find the map part of Web&Map in the Daylite sidebar below Groups: Web&Map -> Map
| Note: This feature requires at least macOS 10.11 (El Capitan) to be installed. |
3D view and gesture controls
To use the 3D view and gesture controls in Web&Map, follow these steps:
- In the Daylite sidebar, navigate to the Web&Map section and click on Map
- Enter the search term
- Underneath the search field you can determine if Web&Map is supposed to search in your Daylite database or on the internet
- Double-click a search result to display it on the map
- Chose a view type in the top right corner, for example Satellite
- Click on the button 3D to control the 3D view
What do the numbers and pin colors mean?
The following video shows you what the numbers on the map and the color of the pins mean.
The numbers on your map in Web&Map indicate how many contacts are clustered at one location. Zoom in to get a detailed view. The color of the pin then shows the Daylite category of the contact.
Searching and creating records
Searching for contacts, appointments and addresses

Follow these steps to search for contacts, appointments and addresses:
- In the Daylite sidebar, navigate to the Web&Map section and click on Map
- Enter your search term into the search field
- Underneath the search field you can chose to either have Web&Map search the web or your Daylite database
- Double-click a search result to have it displayed on the map
Creating a contact from a search result
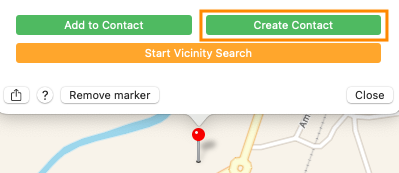
You can create a new contact from a search result in Web&Map right away.
- Click on the map pin to view details of your search result
- Click on the green button Create Contact and select if you'd like to create a company or a person in Daylite
- The window for new entries opens so that you can provide additional details like category or keywords
- Click on Save when you are done entering information
Adding an address to a contact
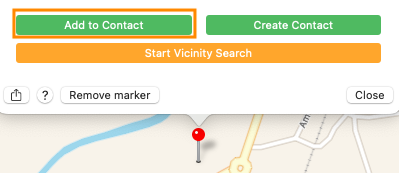
Add a found address to an existing record of a person or company right away.
- Click on the map pin to view details of your search result
- Click on the green button Add to Contact
- A search field opens. Select the company or person that you'd like to add the address to
- Select the set of data. Click on Edit if you like to make changes
Creating a new company record
Web&Map makes it easy to create companies you're working with right away. Useful information such as postal address, telephone number and link to website are added to the company record automatically.
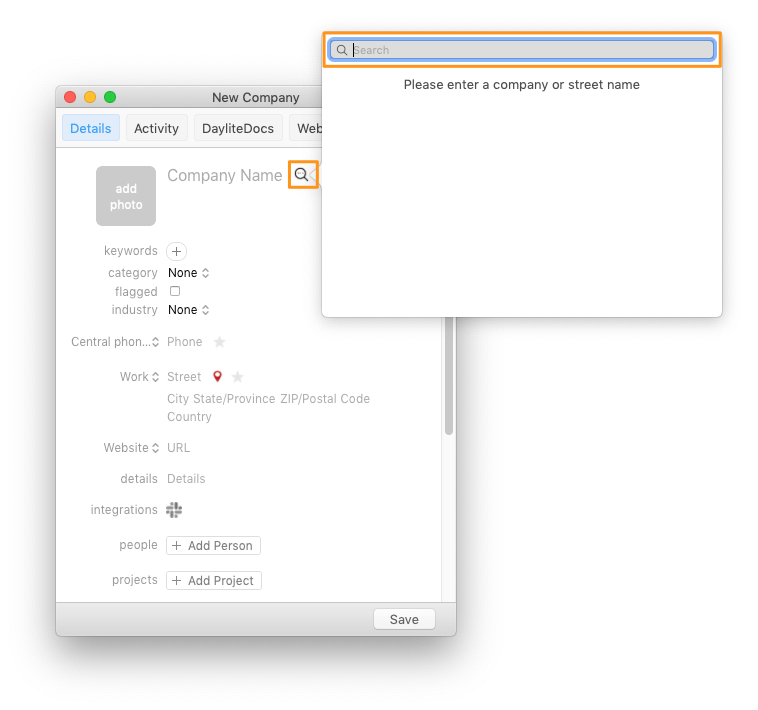
- Navigate within the Daylite sidebar to Contacts -> Companies
- Create a new company by using the + New Company button. You can find it in the upper part of the Daylite window
- Click on the magnifier icon, next to the field Company Name
- Enter the company name or street name to begin the search
- Double-click on the address you'd like to add to the company record
- If required, add further information like category or keyword and save the record
Alternatively, you can create a company record from a search result of your map search – see Creating a contact from a search result.
Address look-up in a company record
Web&Map lets you update address information for company records with one click and lets you add additional addresses quickly. Just use Web&Map's address search via the map pin.
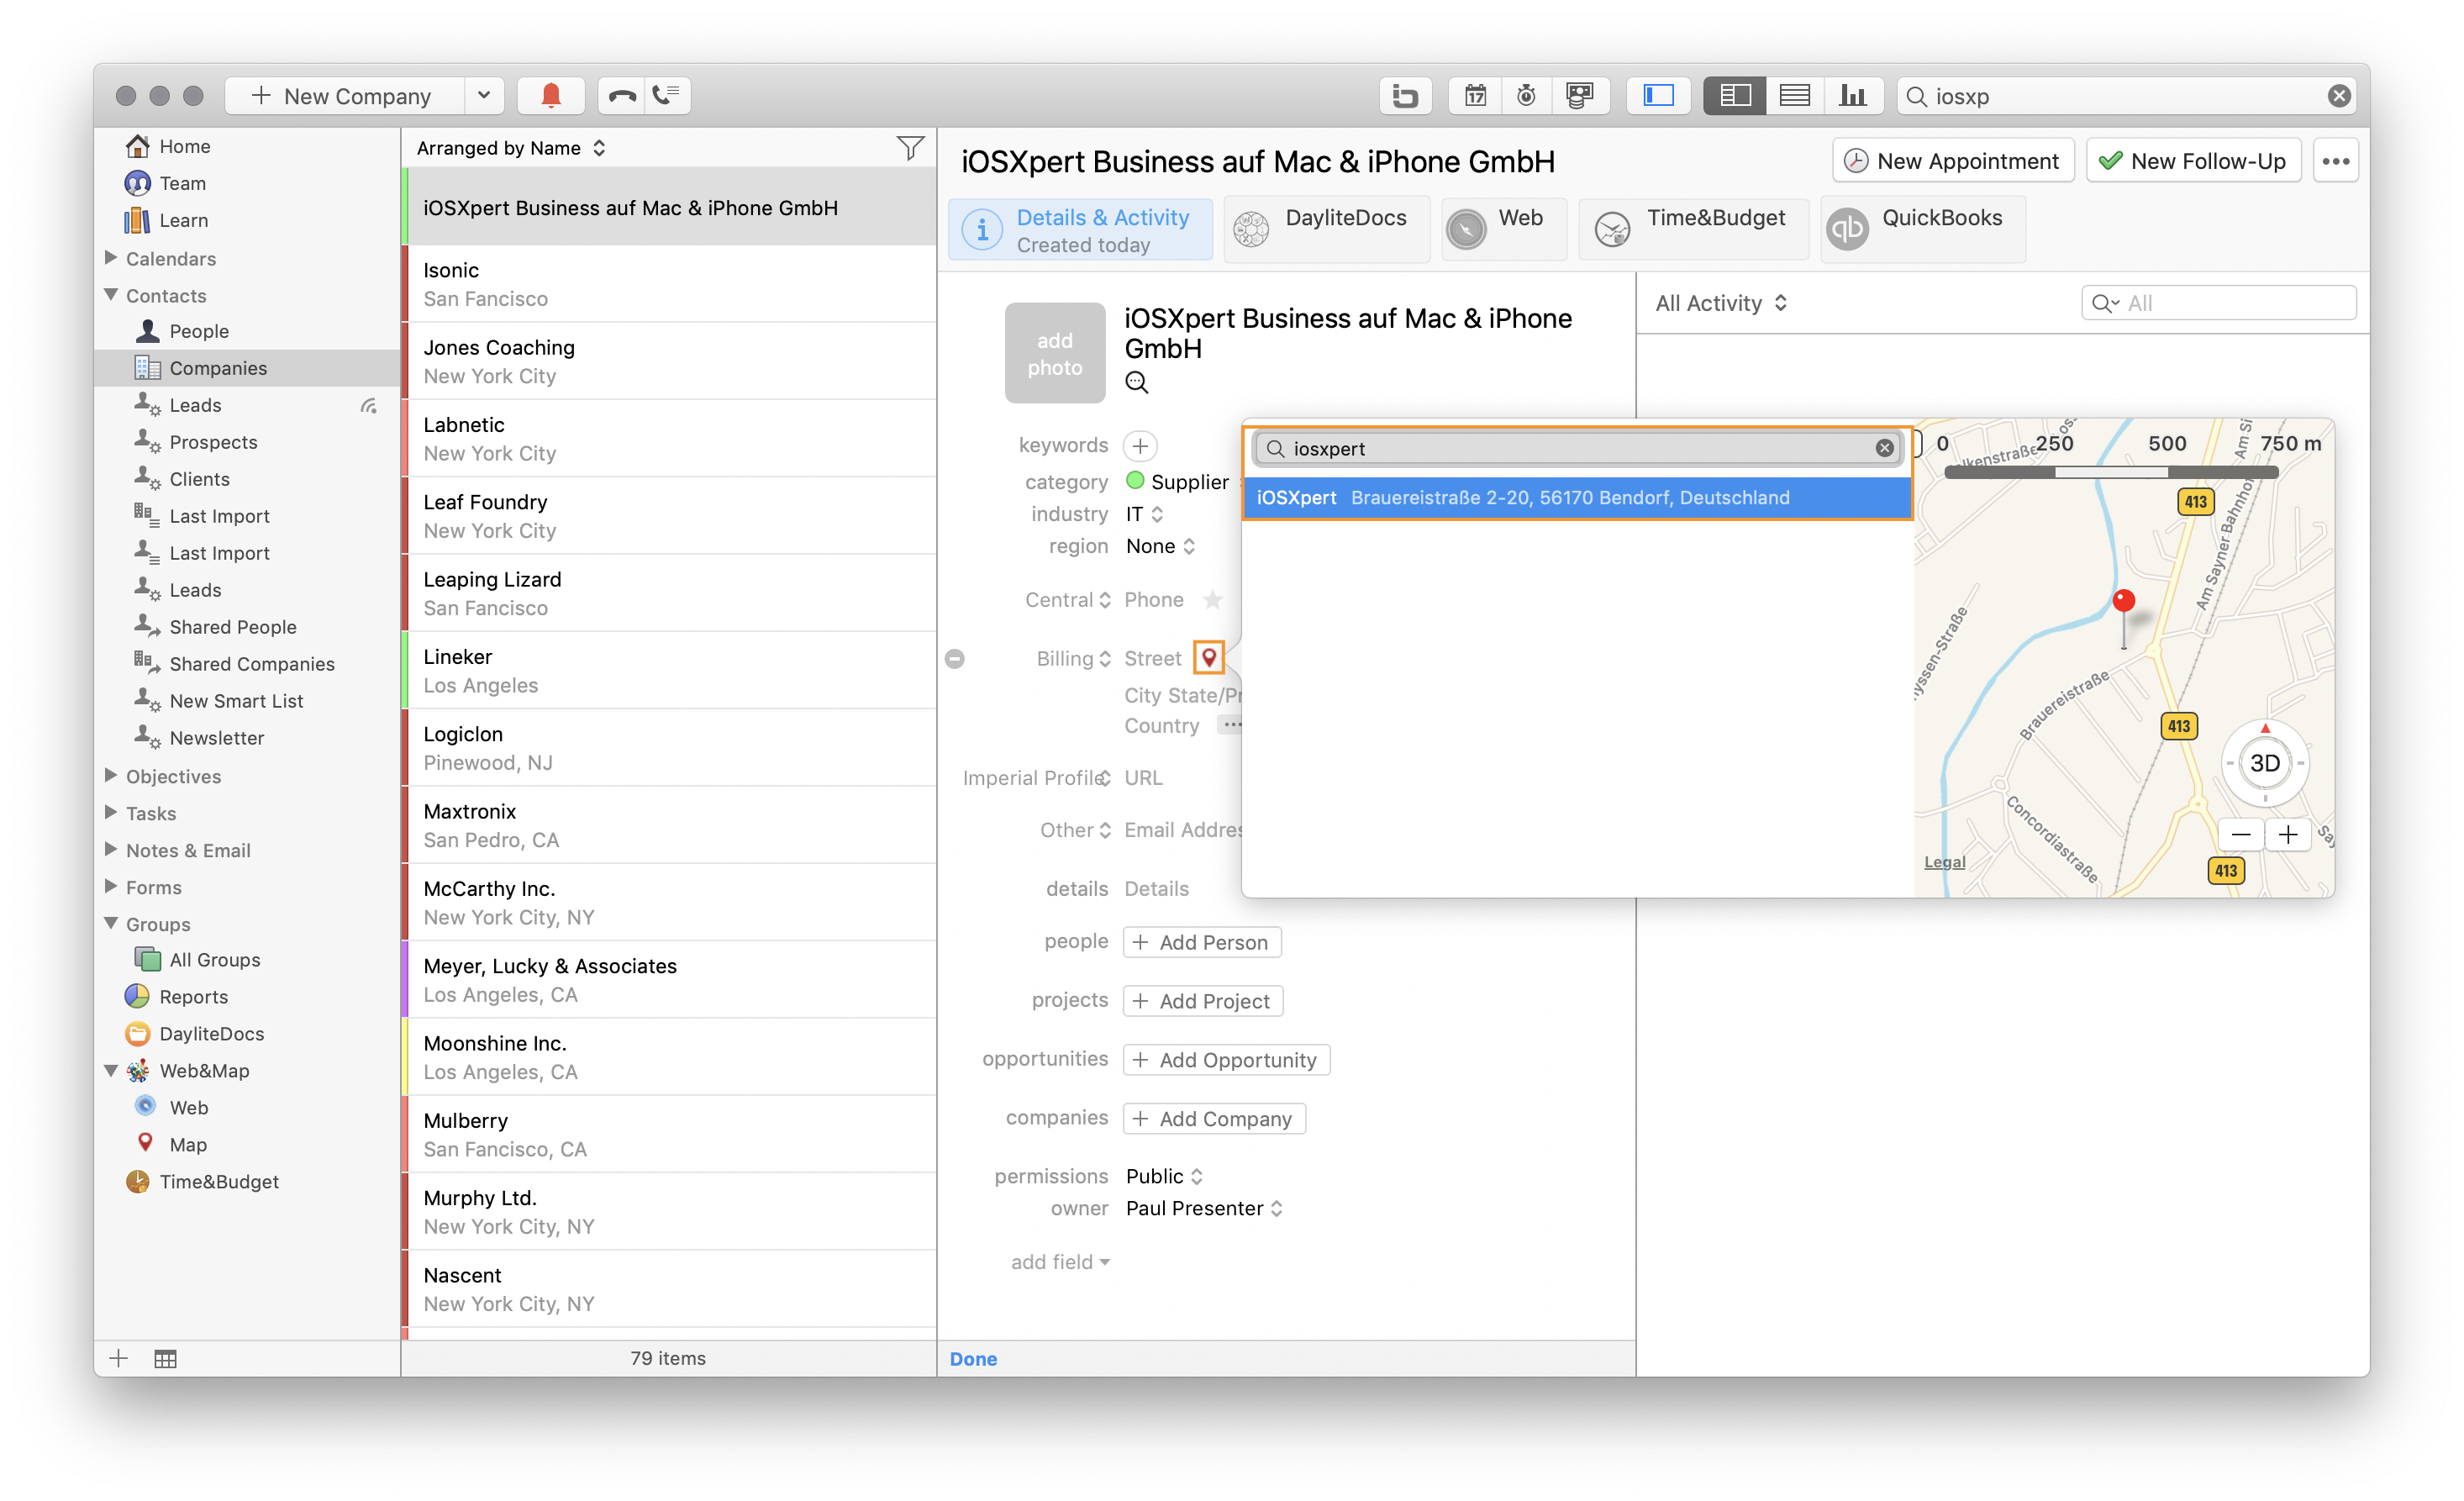
- Open the desired company record in Daylite and click on Edit
- Click on the red maps pin in the address section. Web&Map automatically performs a search for the existing company name. You can edit the search term anytime
- Double-click on the address you'd like to integrate into your record
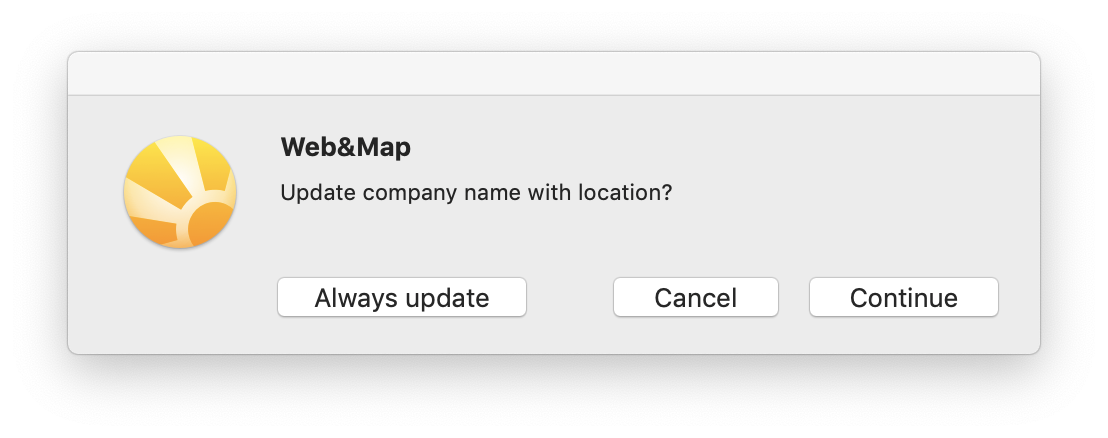
- If the company name from the search differs from the current company name in Daylite, Web&Map automatically offers you to replace the record entry with the new name
| Please note: If you use the address search in Web&Map for a record that already contains an address, the old address will be replaced when you integrate the new one from the search. |
Address look-up in a person's record
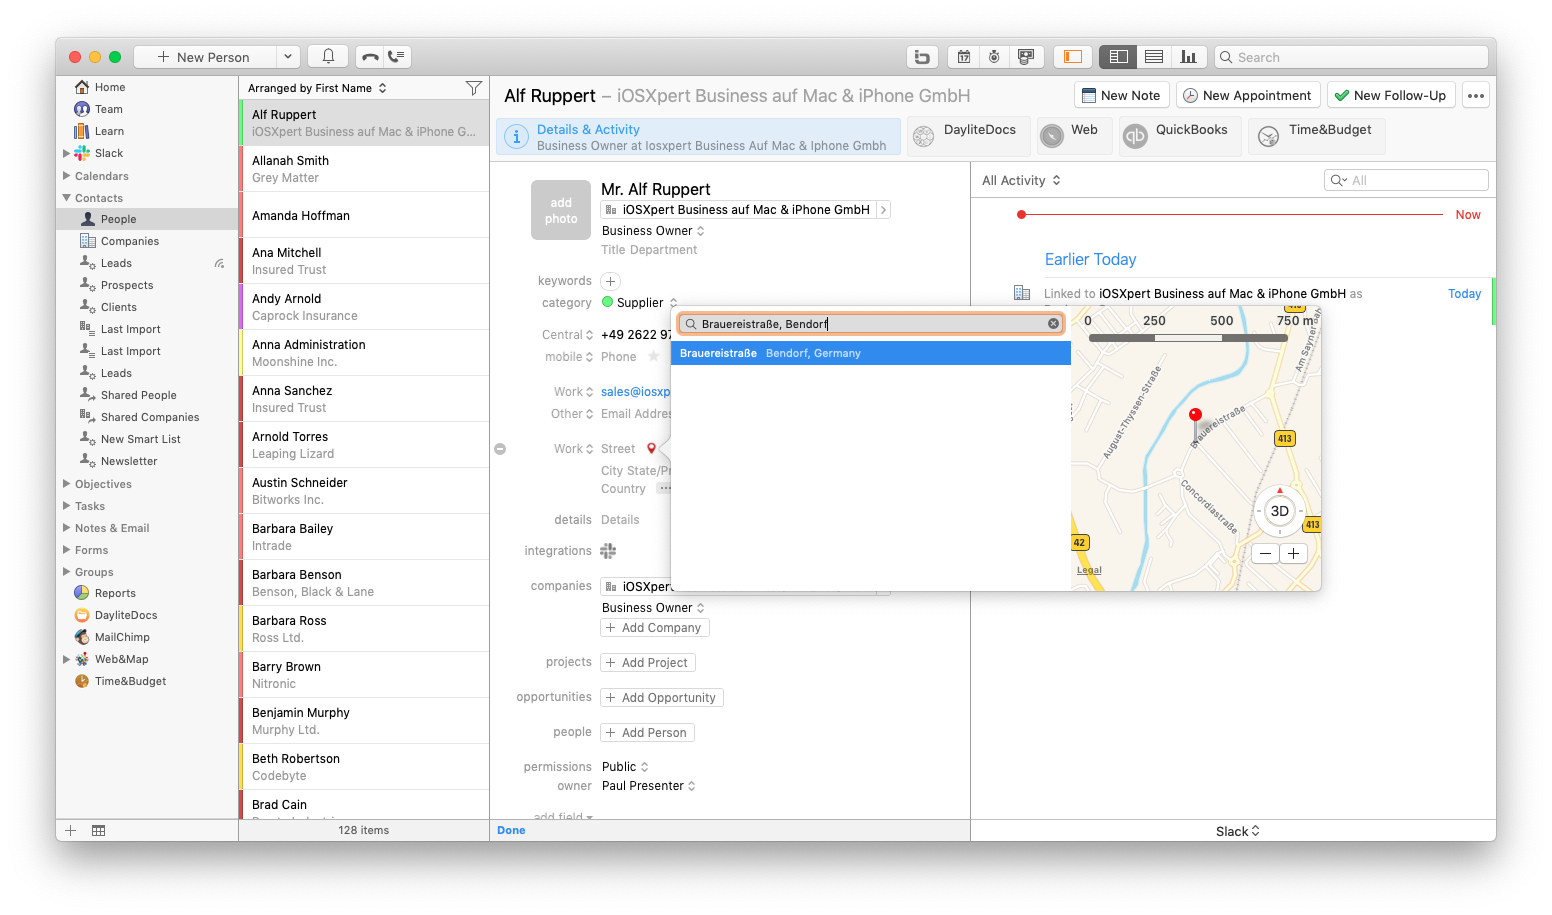
- Open the desired person's record in Daylite and click on Edit
- Click on the red maps pin in the address section. Enter your search string and press return to begin the search
- Double-click on the address you'd like to integrate into your record
| Please note: If your record already has an address Web&Map will overwrite the old entry if you use address search and select a new address. |
Address look-up in an appointment
Web&Map lets you update or add address information for a Daylite appointment with one click. Just use Web&Map's address search via the map pin.
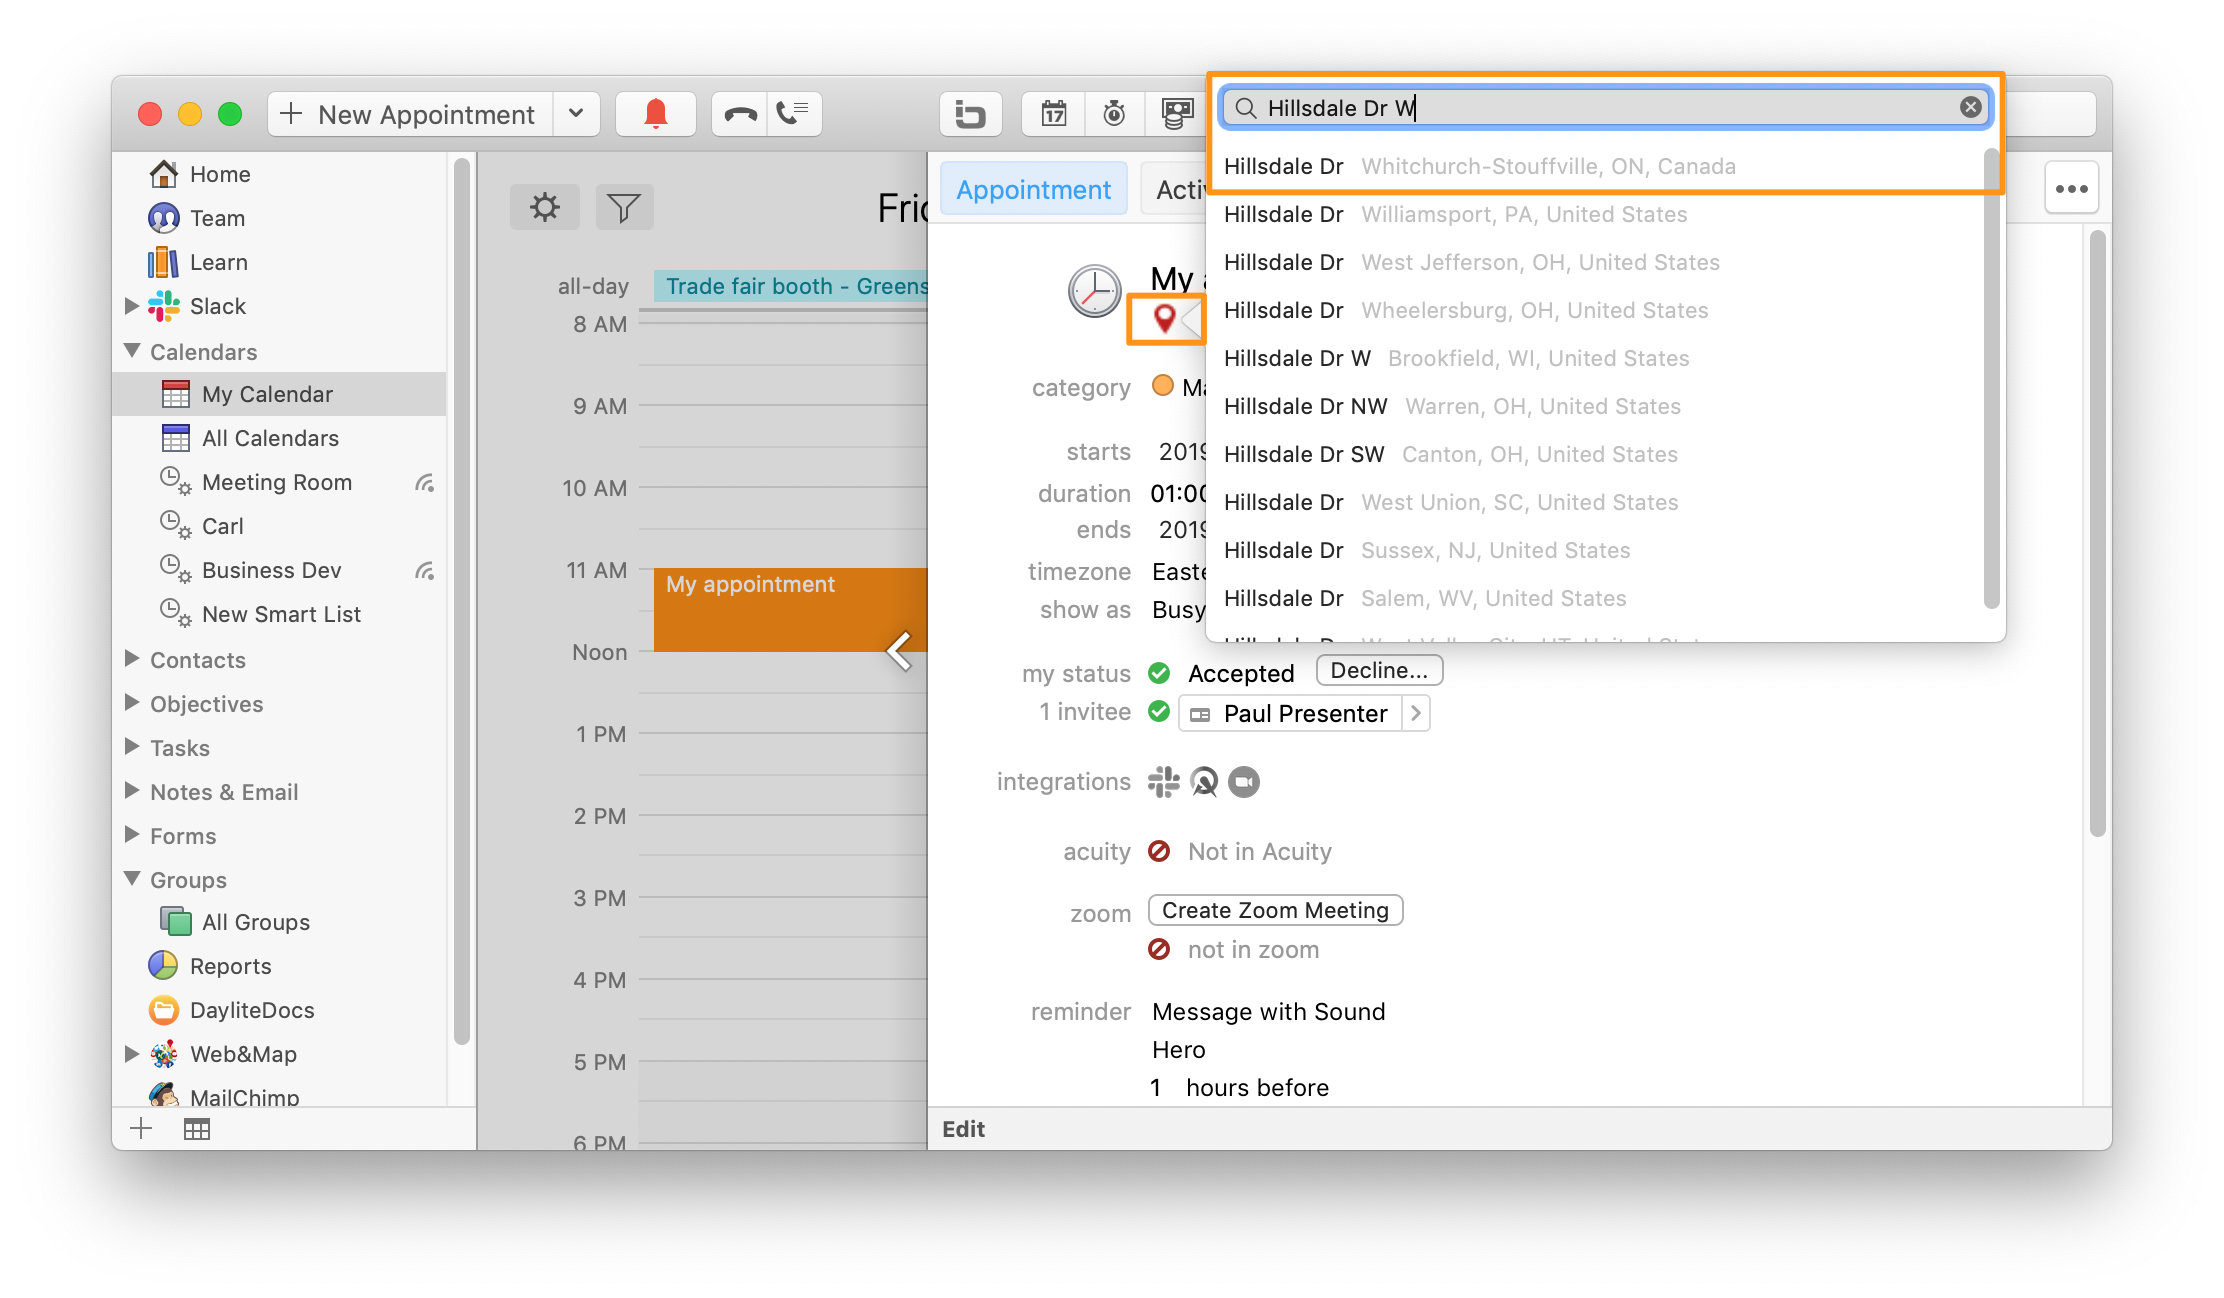
- Open the desired appointment in Daylite and click on Edit
- Click on the red maps pin in the location section. Enter your search string to begin the search
- Double-click on the address you'd like to integrate into your record
| Please note: If you use the address search on an appointment that already has an address associated with it, the new address from the search will overwrite the existing address on file. |
Showing appointments on the map
Web&Map shows the addresses of your appointments from Daylite in an Apple Maps view. Open the detailed view of the appointment, share the address to the Apple Maps app and display the route to your appointment.
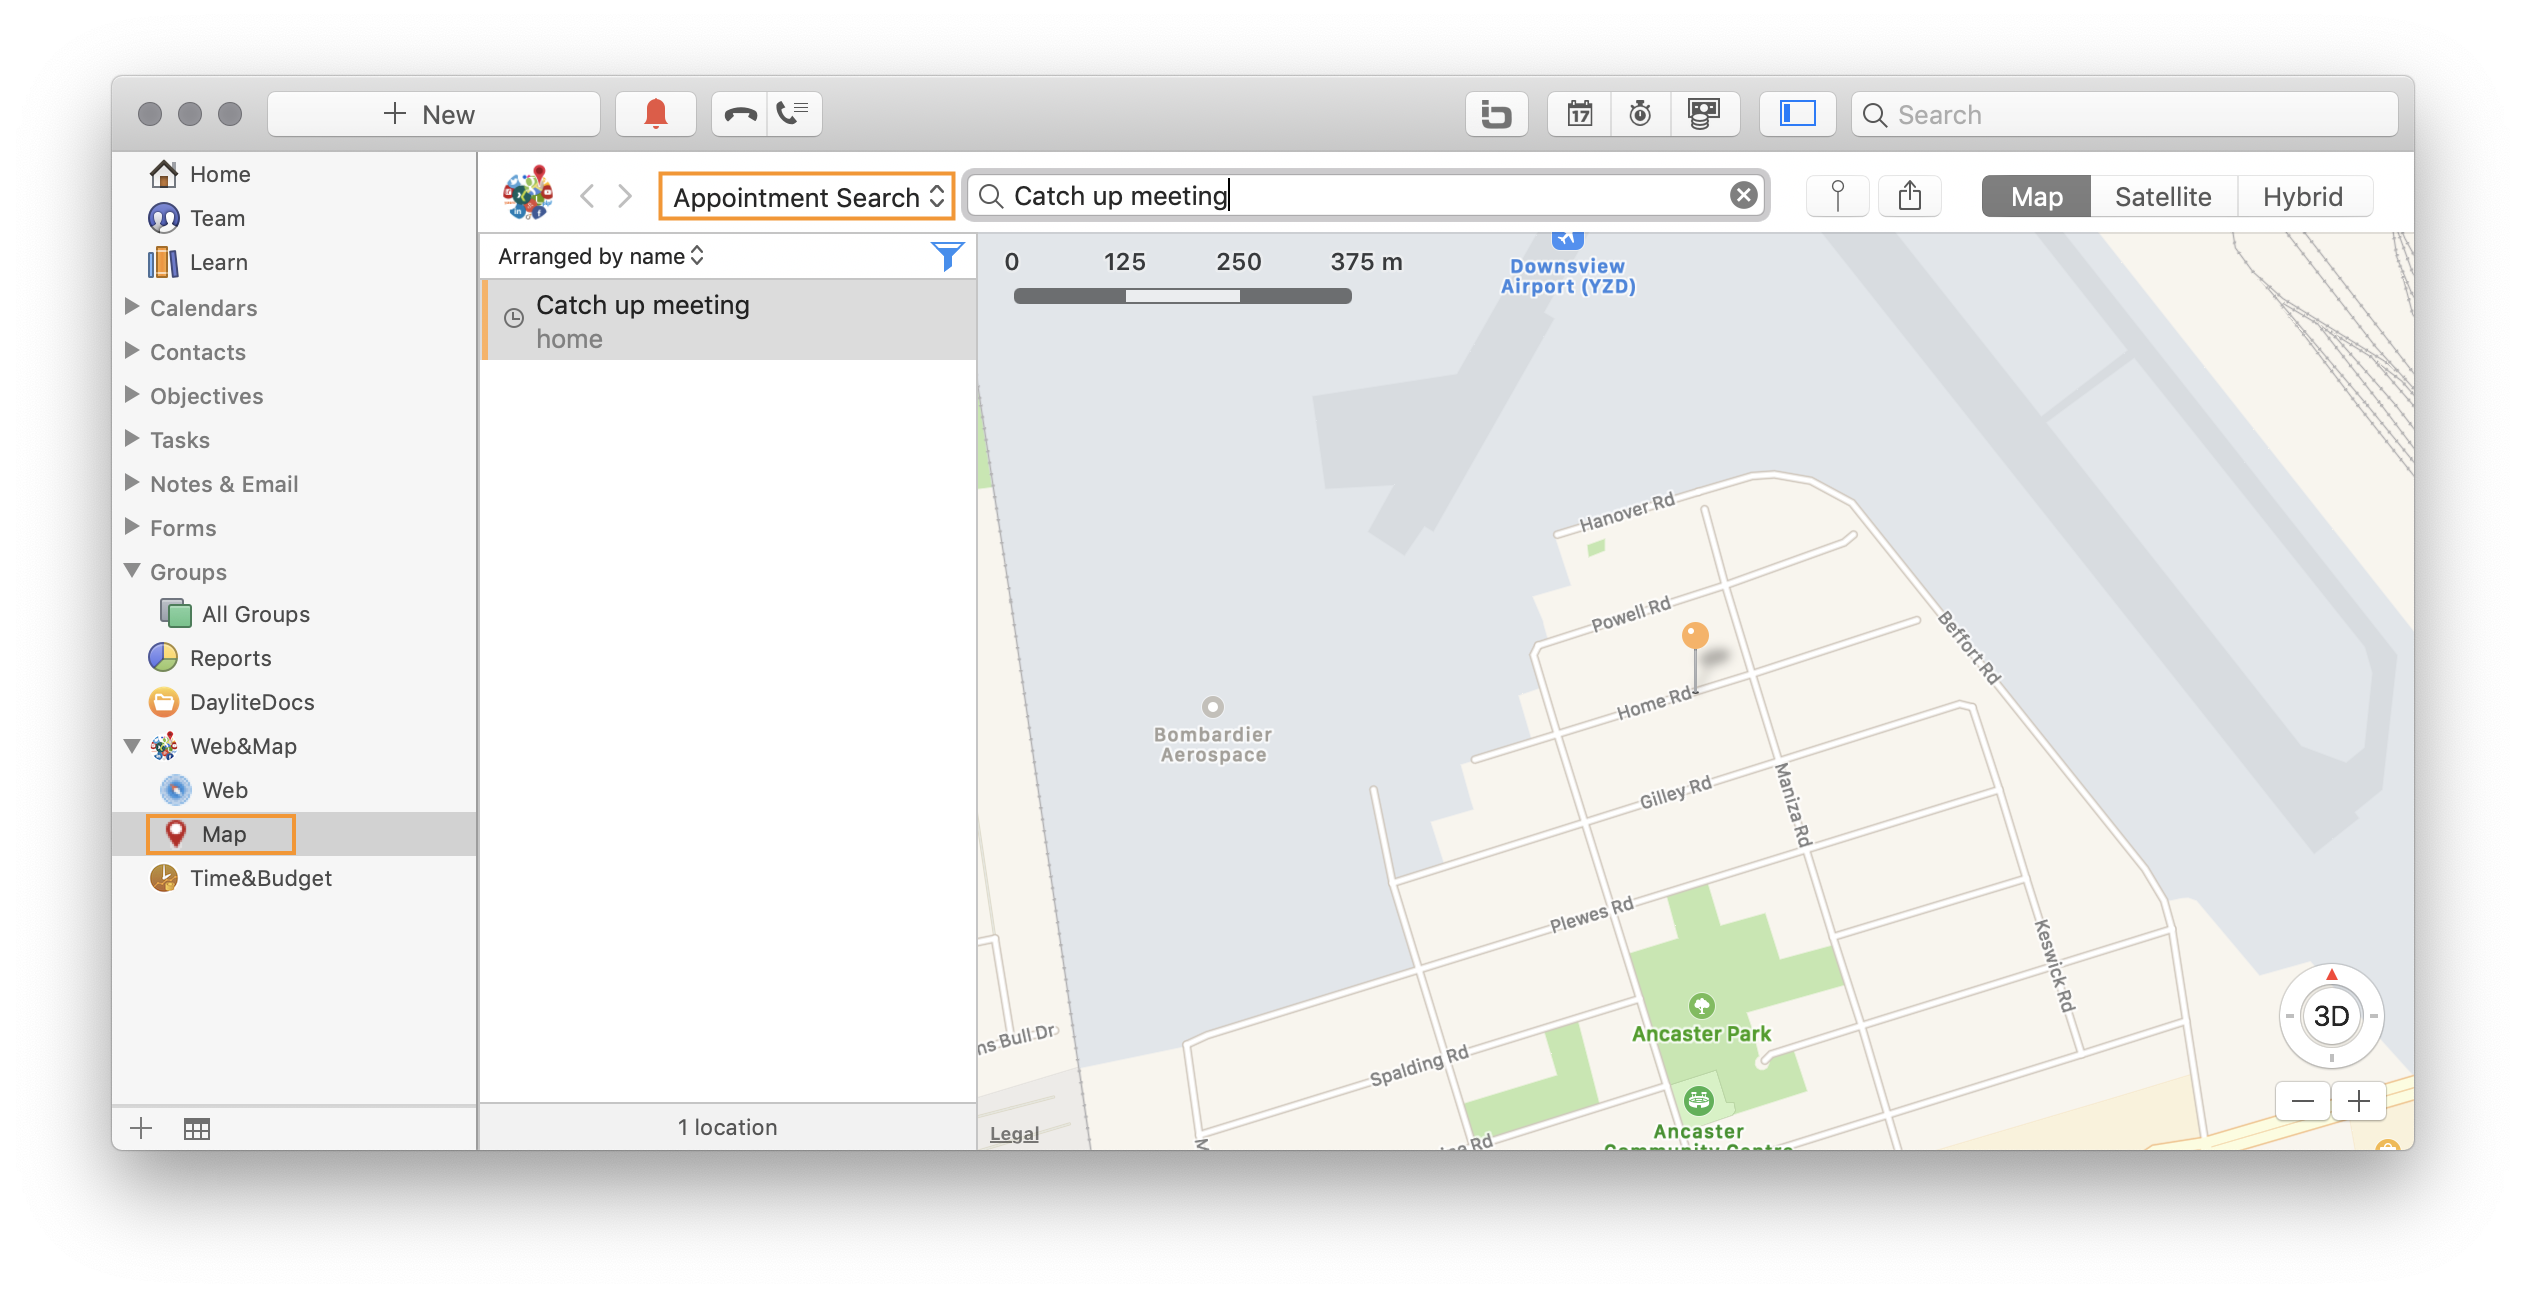
To show an appointment in Web&Map, do the following:
- In Daylite, go to the sidebar on the left and select Web&Map -> Map
- Select Appointment Search from the dropdown menu
- Enter the name of the appointment into the search field
- Double-click the desired result
- Click on the map pin to view the details of this search result
Displaying records on the map
Displaying a selection of contacts
To display a selection of contacts on the map, proceed as follows:
- In the Daylite sidebar, navigate to Contacts and select the desired companies or persons
(hold the command key to select multiple entries) - Right-click and select Show selection on Map
- The selected contacts are now displayed on the map
You can now perform a vicinity search on these results as well.
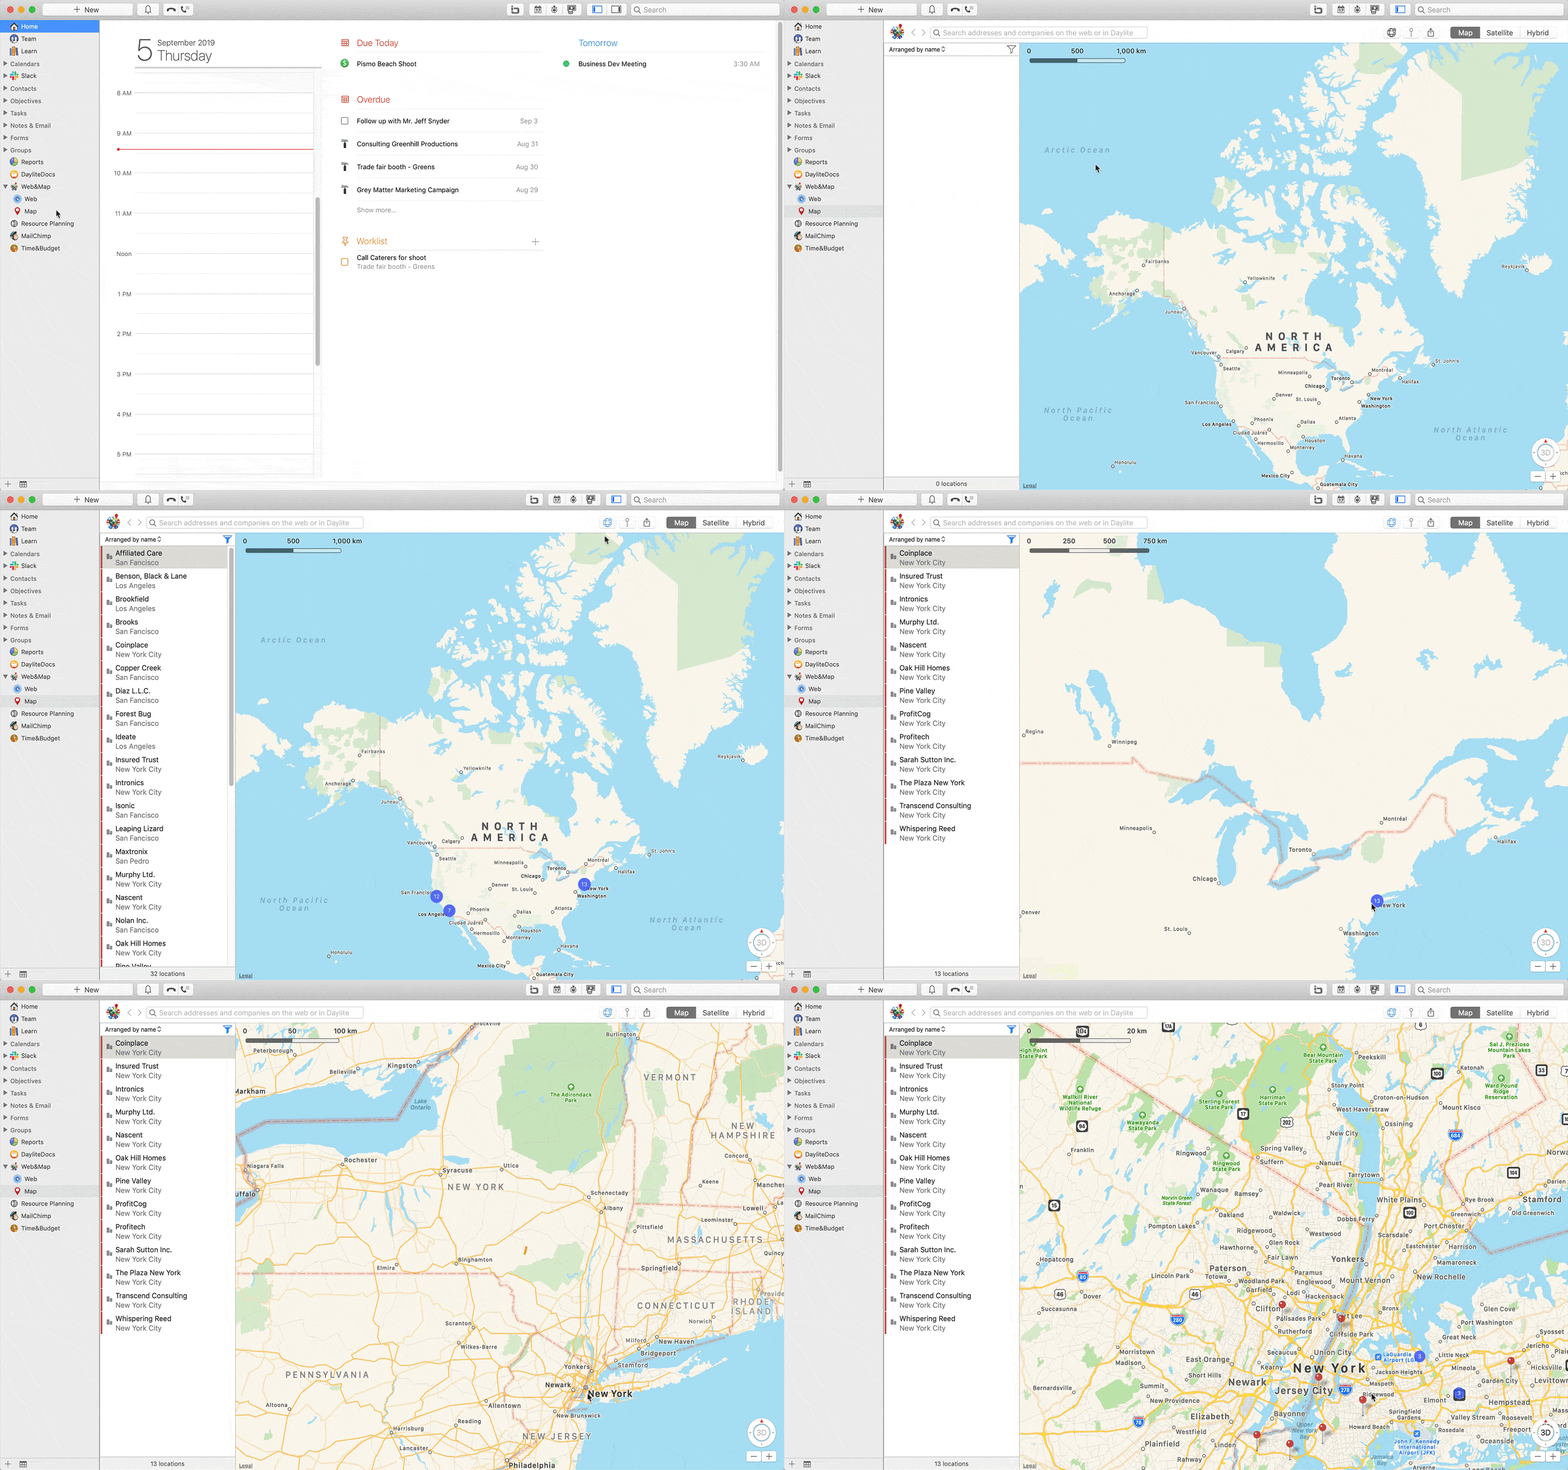
Viewing all Daylite locations
To view all your locations from Daylite follow these steps:
- Navigate in the Daylite sidebar to Web&Map and click on Map
- Click on this icon:
- All your geo-coded contacts and appointments are now being displayed either as clusters or as individual pins.
- Zoom in or out of the area you'd like to view
Viewing contact details
The following video shows you how to view contact details on Map.
To display details of customers using Map, proceed as follows:
- Open the map
- Double-click on the desired contact
| Note: The prerequisite for this is that at least macOS 10.11 (El Capitan) is installed. |
Using the detail view and editing contacts
To open the detailed view in Web&Map, you can select a person on the list or a pin on the map.
In the detail field, you can edit a contact or perform actions on that contact, such as writing an email or making a call.
Getting back to your last search
The following video will show you how to get back to your last search.
| Note: The prerequisite for this is that at least macOS 10.11 (El Capitan) is installed. |
Saving the map view as an image
To save a map view as an image, please proceed as follows:
- Select the desired contacts in Daylite. If selecting multiple, keep the command key pressed while doing so
- Navigate in the menu bar to Plugins -> Web&Map -> Show selection on Map
- Click the share button and select Save map as image
In the following save dialogue you can specify where to save the image on your Mac.
If you'd like to add the function Show selection on map in the contextual menu, check out this article: Can I change the menu of the right mouse button?
Vicinity search
Web&Map offers you the possibility to display persons and companies in the vicinity of a selected person or set of data with a geo coordinate. In return you can also search for a location on the map and have your nearby Daylite data sets displayed.
| Prerequisite: Your contacts in Daylite need geo coordinates (latitude and longitude). See Geocoding your database manually to learn how to geocode your addresses. |
Vicinity search based on a map search
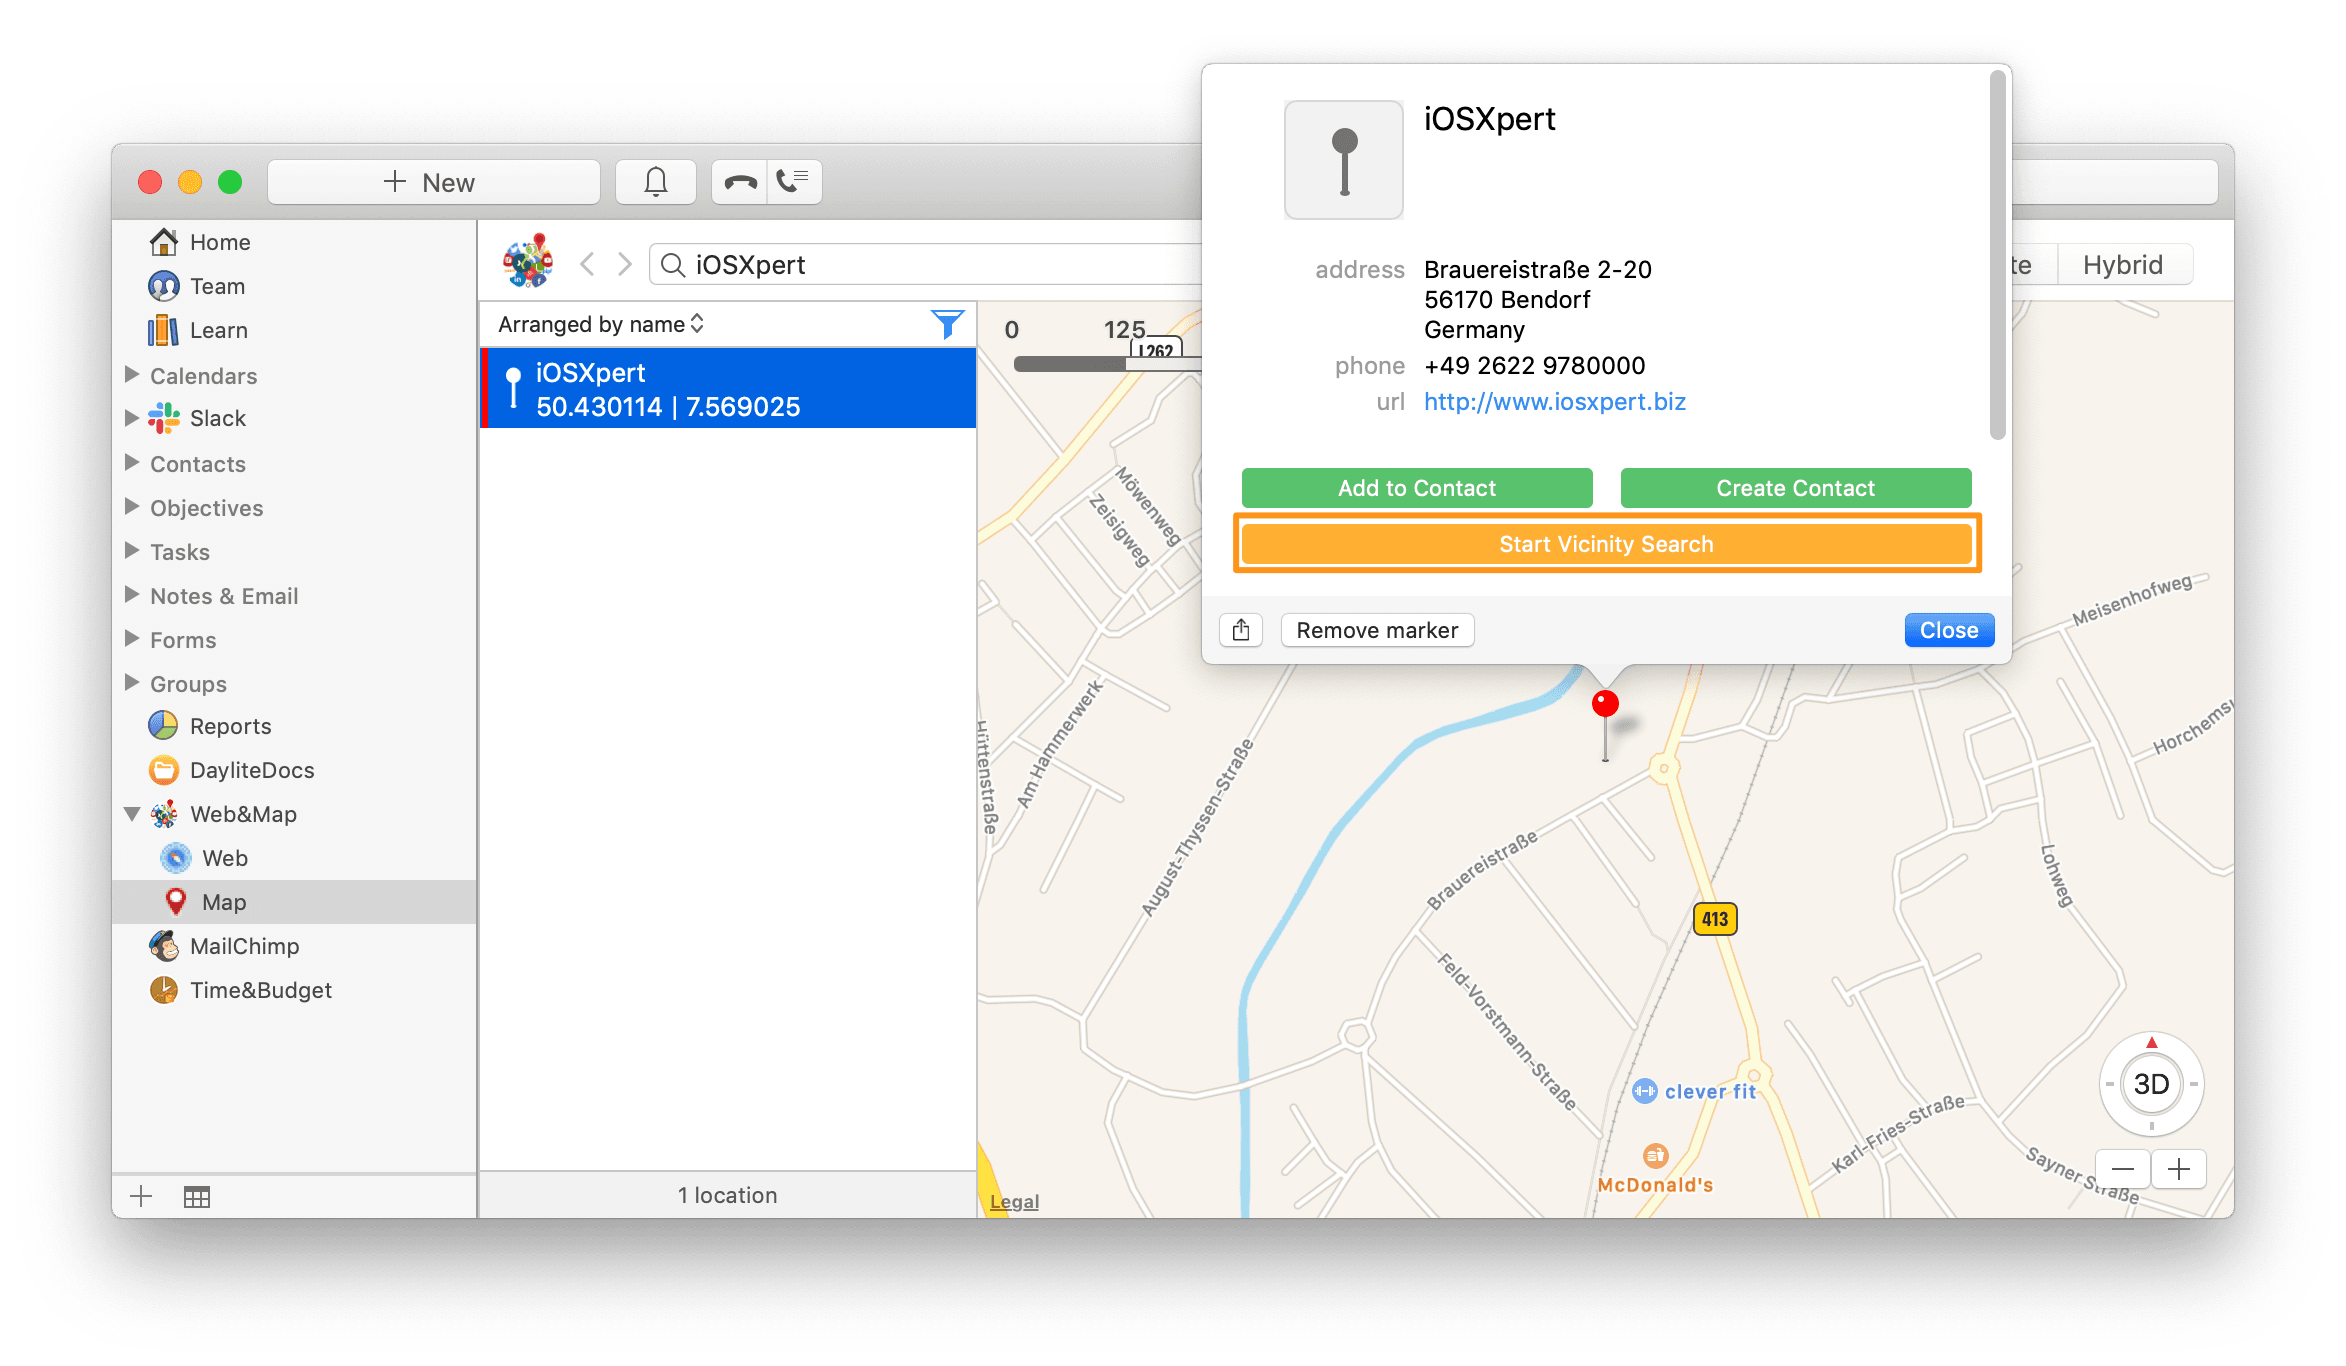
To start a vicinity search based on a map search, proceed as follows:
- In the Daylite sidebar navigate to Web&Map and click on Map
- Enter the search term
- Double click a result to display it on the map
- Click on Start Vicinity Search
Vicinity search based on a set of Daylite data
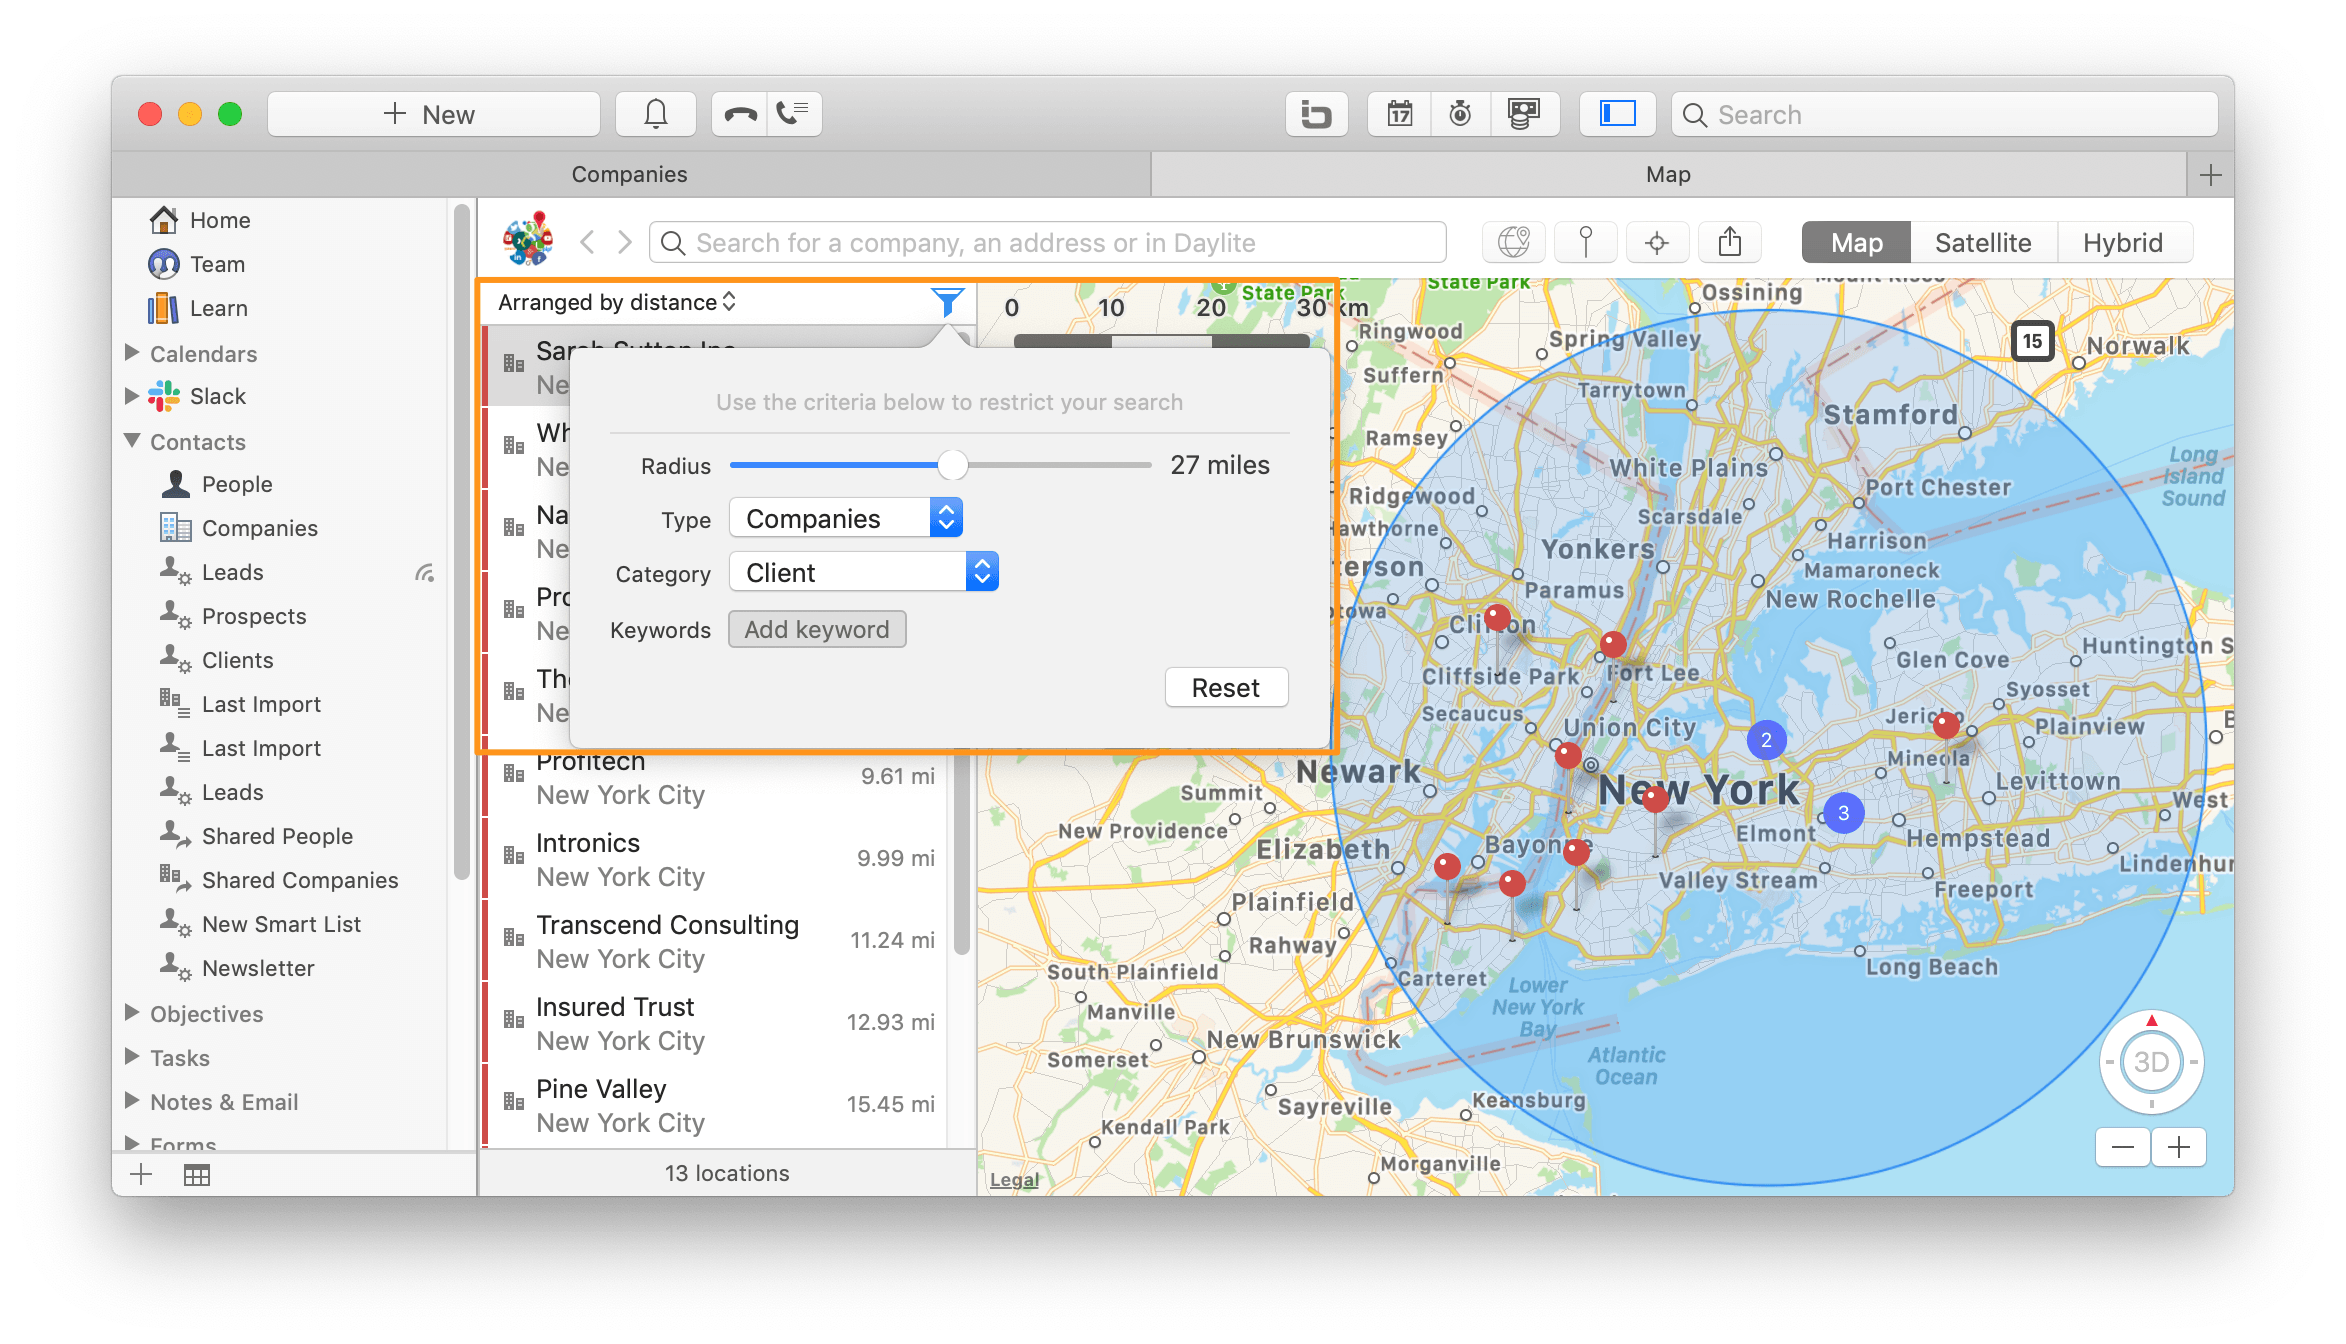
To start a vicinity search based on a set of Daylite data, proceed as follows:
- Select the set of data on which you want to start a vicinity search
- Go to Plugins -> Web&Map -> Vicinity Search
- Use the filter symbol to define the radius
Free vicinity search
A free vicinity search lets you drop a map pin on a point on the map and search from there.

To start a free vicinity search, proceed as follows:
- In the Daylite sidebar navigate to Web&Map and click on Map
- Click on the pin to the right above the map (the free vicinity search icon, see screenshot above)
- Click on the point of the map where you'd like to search
- Use the filter symbol above the contact display to define the radius
Click here to learn how to define the vicinity search as a right mouse button function:
Can I change the menu of the right mouse button?
Saving the result of a vicinity search
To save a vicinity search as a smart list in Daylite, proceed as follows:
- Perform a vicinity search
- Filter according to the desired values
- Click on the share icon and select Save persons as list
- Type in a name for the list
Planning a route with Apple Maps
Handing a search result to Apple Maps
Transfer your search result to Apple Maps to plan a route easily.
To plan a route with Web&Map, please proceed as follows:
- Search for a contact, address or appointment of your choice
- Click on the button
and select Open in Apple Maps
- Now the Apple Maps window opens
- Click on Directions in the upper left corner to begin routing