The FinanceConnector enables you to connect different invoicing systems to Daylite. Transfer customer and performance data to your billing program.
With the iOSXpert Plugin FinanceConnector you can quickly transfer, update or link the data collected in Daylite to your invoicing system. This saves you the error-prone and time-consuming double entry of customer data.
The FinanceConnector displays important information from your invoicing system in Daylite, e.g. the invoices of your customers. Every employee who has activated the FinanceConnector in Daylite can see the customer's commercial data, even if he has no access to the commercial system himself.
Table of contents
Connecting a billing system
- How do I set up the FinanceConnector for use with easybill?
- How do I set up the FinanceConnector for use with sevDesk?
- How do I set up the FinanceConnector for use with totals?
- How do I setup the FinanceConnector for use with QuickBooks?
- How do I authorize the FinanceConnector in QuickBooks Online?
Exchanging data
- How do I transfer updated data to my billing system?
- How do I link contacts with an existing record from a billing system?
- How do I transfer contacts to an invoicing system with FinanceConnector?
- How do I submit an offer to my billing system?
Invoices & information
Connecting a billing system
How do I set up the FinanceConnector for use with easybill?
To use the FinanceConnector with easybill, a so called API key from easybill must be deposited in Daylite. Proceed as follows:
- Log in to your easybill account via your web browser (e.g. Safari)
-
Click on your profile at the top right and select Profile and settings
- Create an API key, display it and copy it
-
Click on Save
- Open the iOSXpert PluginCenter in Daylite and click on FinanceConnector
- Select easybill as the billing system
- Click on Sign In and enter the API key
-
Click on Connect
How do I set up the FinanceConnector for use with sevDesk?
In order to use the FinanceConnector with sevDesk, a so called API token from sevDesk has to be created once in Daylite. Proceed as follows:
| Please note that the sevDesk API token is only available for sevDesk administrators. |
- Log in to your sevDesk account via your web browser (e.g. Safari)
- Click in the left sidebar on the entry Preferences -> Users
- Select your user
-
Click on Show in sevDesk API Token and enter your password
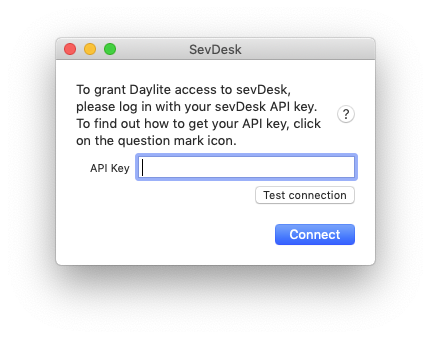
- Select the API token and copy it (⌘ + C) to the clipboard
- Switch to the Daylite program and open the FinanceConnector Preferences via the menu Plugins -> FinanceConnector -> Preferences... and select sevDesk from the dropdown menu
- Log in to your account or add a user via the + icon
- Paste the copied API token into the corresponding field during logon
- Check the connection and confirm with Connect
How do I set up the FinanceConnector for use with totals?
To set up the FinanceConnector with Totals, you need to make settings in both Totals and Daylite preferences.
- Open the Totals app
- Navigate to Settings -> Advanced Settings
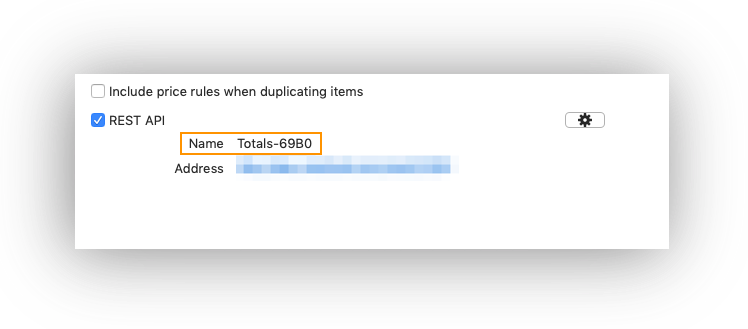
- Activate the checkbox for the REST-API
-
Copy the name
- Open Daylite
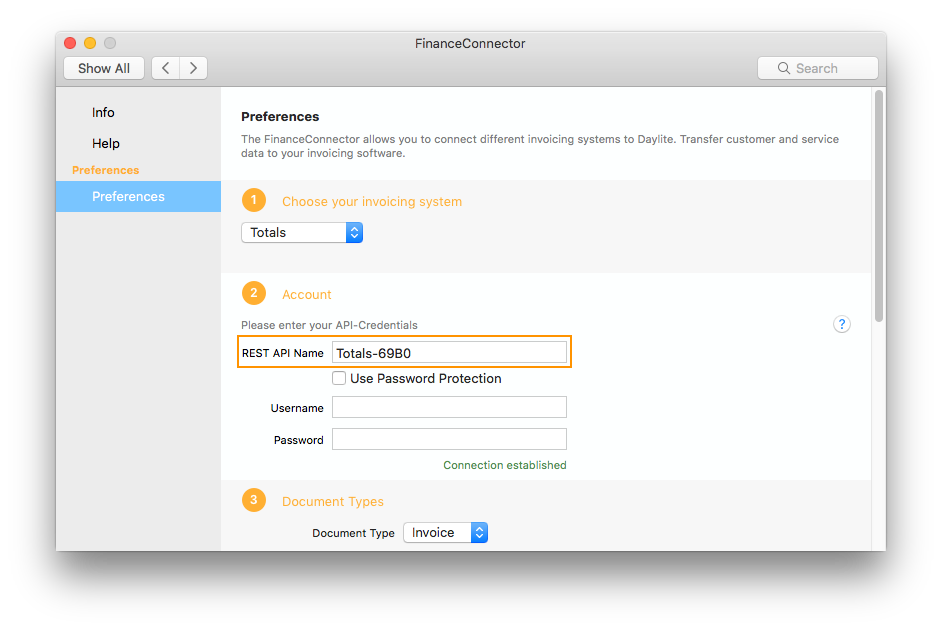
- Navigate to PluginCenter -> FinanceConnector -> Preferences
- Select Totals in the service menu
-
Paste in the name of the REST-API
| Note: The development of Totals is currently halted, which is why we recommend the alternative QuickBooks or sevDesk in combination with our FinanceConnector app for Daylite. |
How do I setup the FinanceConnector for use with QuickBooks?
Connect the web-based accounting software QuickBooks Online with Daylite through the plugin FinanceConnector. You can transfer customer data in no time from Daylite to QuickBooks to create invoices or offers for services or products.
Account
- Use the Daylite menu bar on top of your screen to navigate from the Daylite Preferences to the iOSXpert PluginCenter
-
In the sidebar, navigate to Preferences and choose QuickBooks as your invoicing system using the drop-down menu
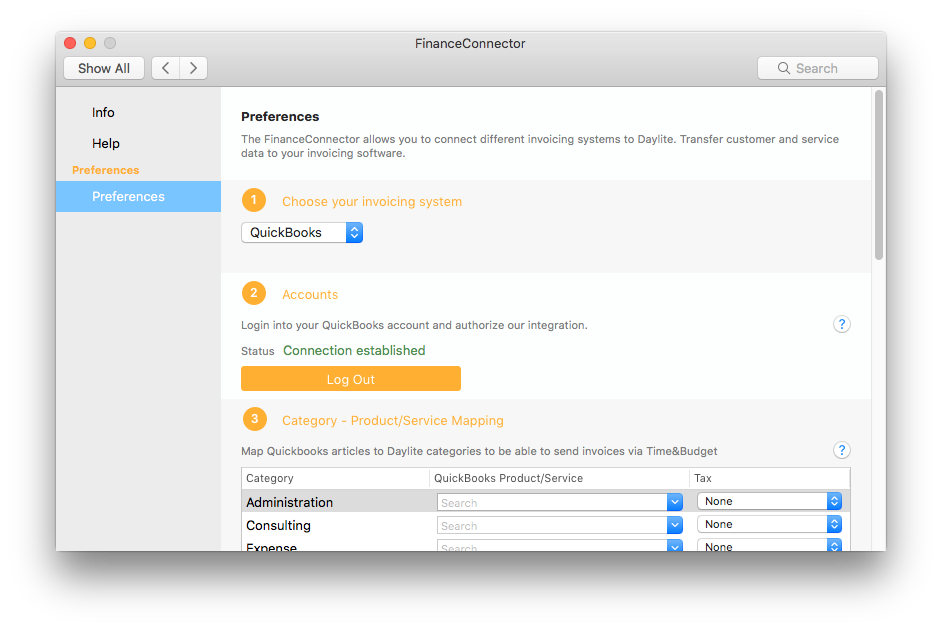
- If you already have a QuickBooks Online account, click on the orange Sign In button. If you're new to QuickBooks, click on the green button to Create New Account
- Enter your QuickBooks account credentials and click on the green Sign in button
- If you have multiple companies connected to this QuickBooks Online account, select which one you want to sync with your Daylite database
- The next screen shows what kind of data will be transferred through FinanceConnector out of Daylite to QuickBooks. Scroll down and click on the green button to Connect
- You should now see that the status has changed to Connection established
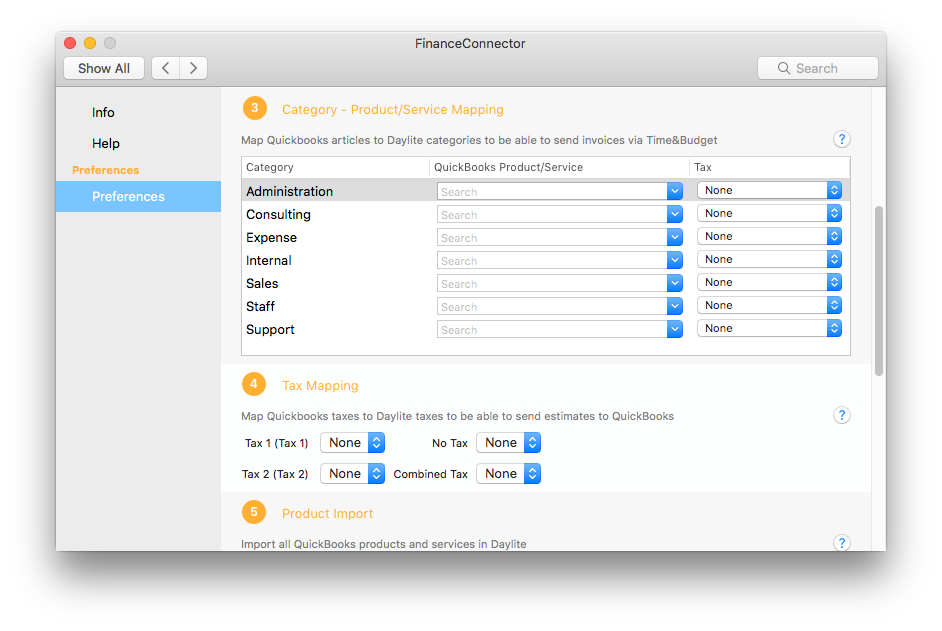
Category and tax mapping
- In step 3, map the Daylite categories to the QuickBooks product/service
-
This step is for QuickBooks users outside of the USA: assign a QuickBooks tax for every Daylite tax
Product import
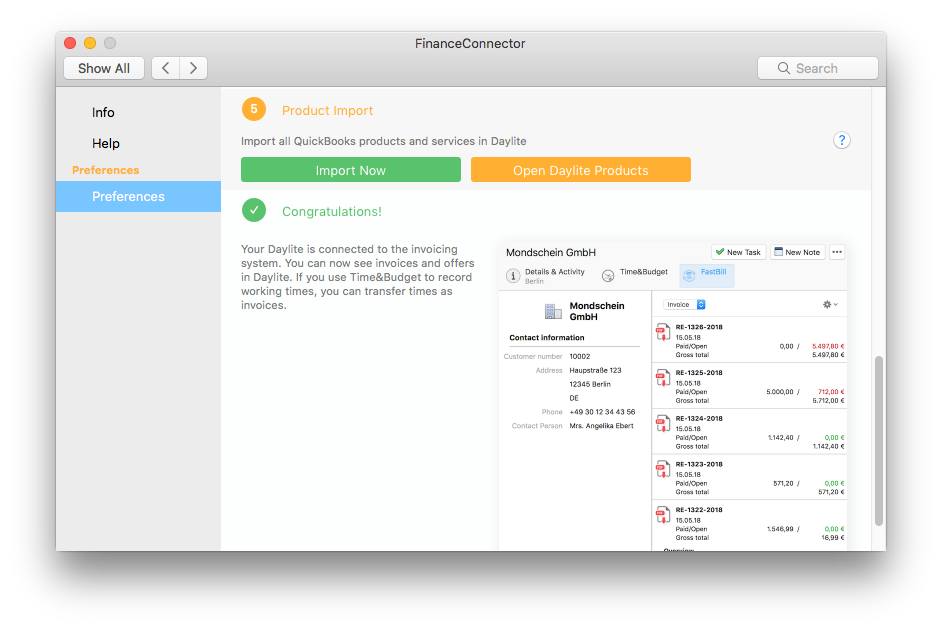
You can import QuickBooks products and services into Daylite to use them, for example, to create a quote in Daylite.
How do I authorize the FinanceConnector in QuickBooks Online?
If you want to use the FinanceConnector with QuickBooks Online, you receive either access or the following message, depending on the user status in QuickBooks:
If you receive this message, a Master Admin or Admin of QuickBooks must authenticate the connection for your user.
| Intuit (manufacturer of QuickBooks Online) is currently working on additional features for the third-party apps, so authentication is not available at the moment. To use the interface anyway, the corresponding QuickBooks user needs Admin permissions. |
Exchanging data
How do I transfer updated data to my billing system?
With the iOSXpert Plugin FinanceConnector you can transfer updated data from your Daylite database, e.g. a new address, to a compatible, connected billing system.
- Switch to the tab Finance
- Click on the gear symbol to open the settings
- Choose Update data
- Specify whether to transfer a person with the company
- Click on Create
- The data in your billing system has been updated
Section 7 explains how to link a contact to an existing data record in the billing system by entering a reference number.
How do I link contacts with an existing record from a billing system?
With the iOSXpert Plugin FinanceConnector you can quickly connect your contacts from Daylite with already existing records from a compatible, connected billing system.
- Open the desired contact and switch to the FinanceConnector tab
- Click on the button Link existing person/company
- Enter the customer number from your billing system and click on Link
- The contact is now linked and information from the billing system is displayed
How do I transfer contacts to an invoicing system with FinanceConnector?
Once you have installed and configured the FinanceConnector, the FinanceConnector tab is available with Persons and Companies in Daylite. If the selected contact has not yet been transferred to the billing system, buttons are displayed in this tab to create the contact in the billing system.
It is also possible to link the contact to an existing billing system data record by specifying a reference number (see section 7).
If you have already linked the data record to the billing system, the FinanceConnector tab displays information from the billing system (see section 11).
How do I submit an offer to my billing system?
With the iOSXpert Plugin FinanceConnector you can transfer your offers from Daylite directly to your billing system.
| Note: TOPIX and MonKey Office do not support the transfer of offers from Daylite. |
- Select the opportunity that contains the offer you want to submit
- Switch to the Finance tab, this tab bears the name of the linked billing system
-
Submit the offer to the billing system with the button Send to XXX
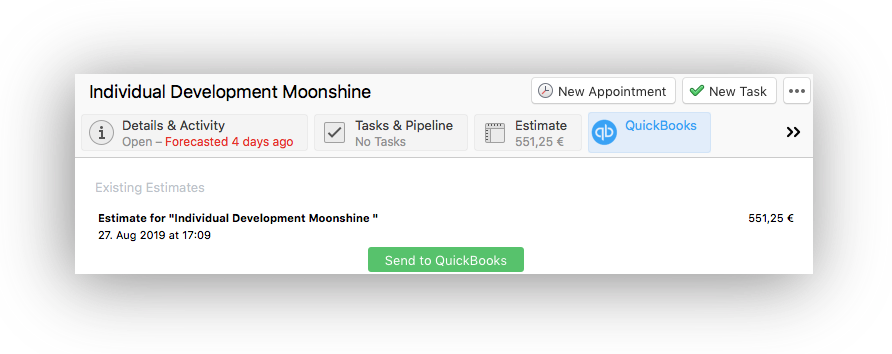
- The offer has now been transferred to your billing system and is displayed in the corresponding Finance tab of the Daylite contact
Invoices & information
Can I use Daylite to create invoices?
With our plugin FinanceConnector you can connect a compatible billing system to Daylite. Using the Time&Budget plugin, you can transfer recorded times and expenses from projects to the billing system to create an invoice. This invoice can be downloaded and sent to your customers from within Daylite and is automatically documented in your Daylite database.
The following features are available with our FinanceConnector plugin:
- Transfer, update and linking of contacts from Daylite
- View all invoices and offers with your total volume for each contact in Daylite
- Opening documents from the billing system in Daylite
- Transfer of project times to a compatible billing system for invoice generation
- Import of goods and services into Daylite from the billing system
- Transfer of offers from Daylite to the billing system
The following billing systems are compatible with the FinanceConnector: QuickBooks.
How can I view the billing information with FinanceConnector?
If the FinanceConnector has been configured and the contact selected in Daylite has already been connected to the billing system, the Finance tab will display information from the billing system at the Daylite contact.
These also include a list of invoices sent to the sales activity, including the current payment status from the billing system. This gives you a quick overview of invoices and payment status directly from Daylite.